My easy sourdough bread recipe is perfect for enjoying on its own or using for sandwiches! I’ll be walking you in detail through every step so you can learn how to make perfect sourdough like a pro. Recipe includes a how-to video!
The Best Sourdough Bread Recipe
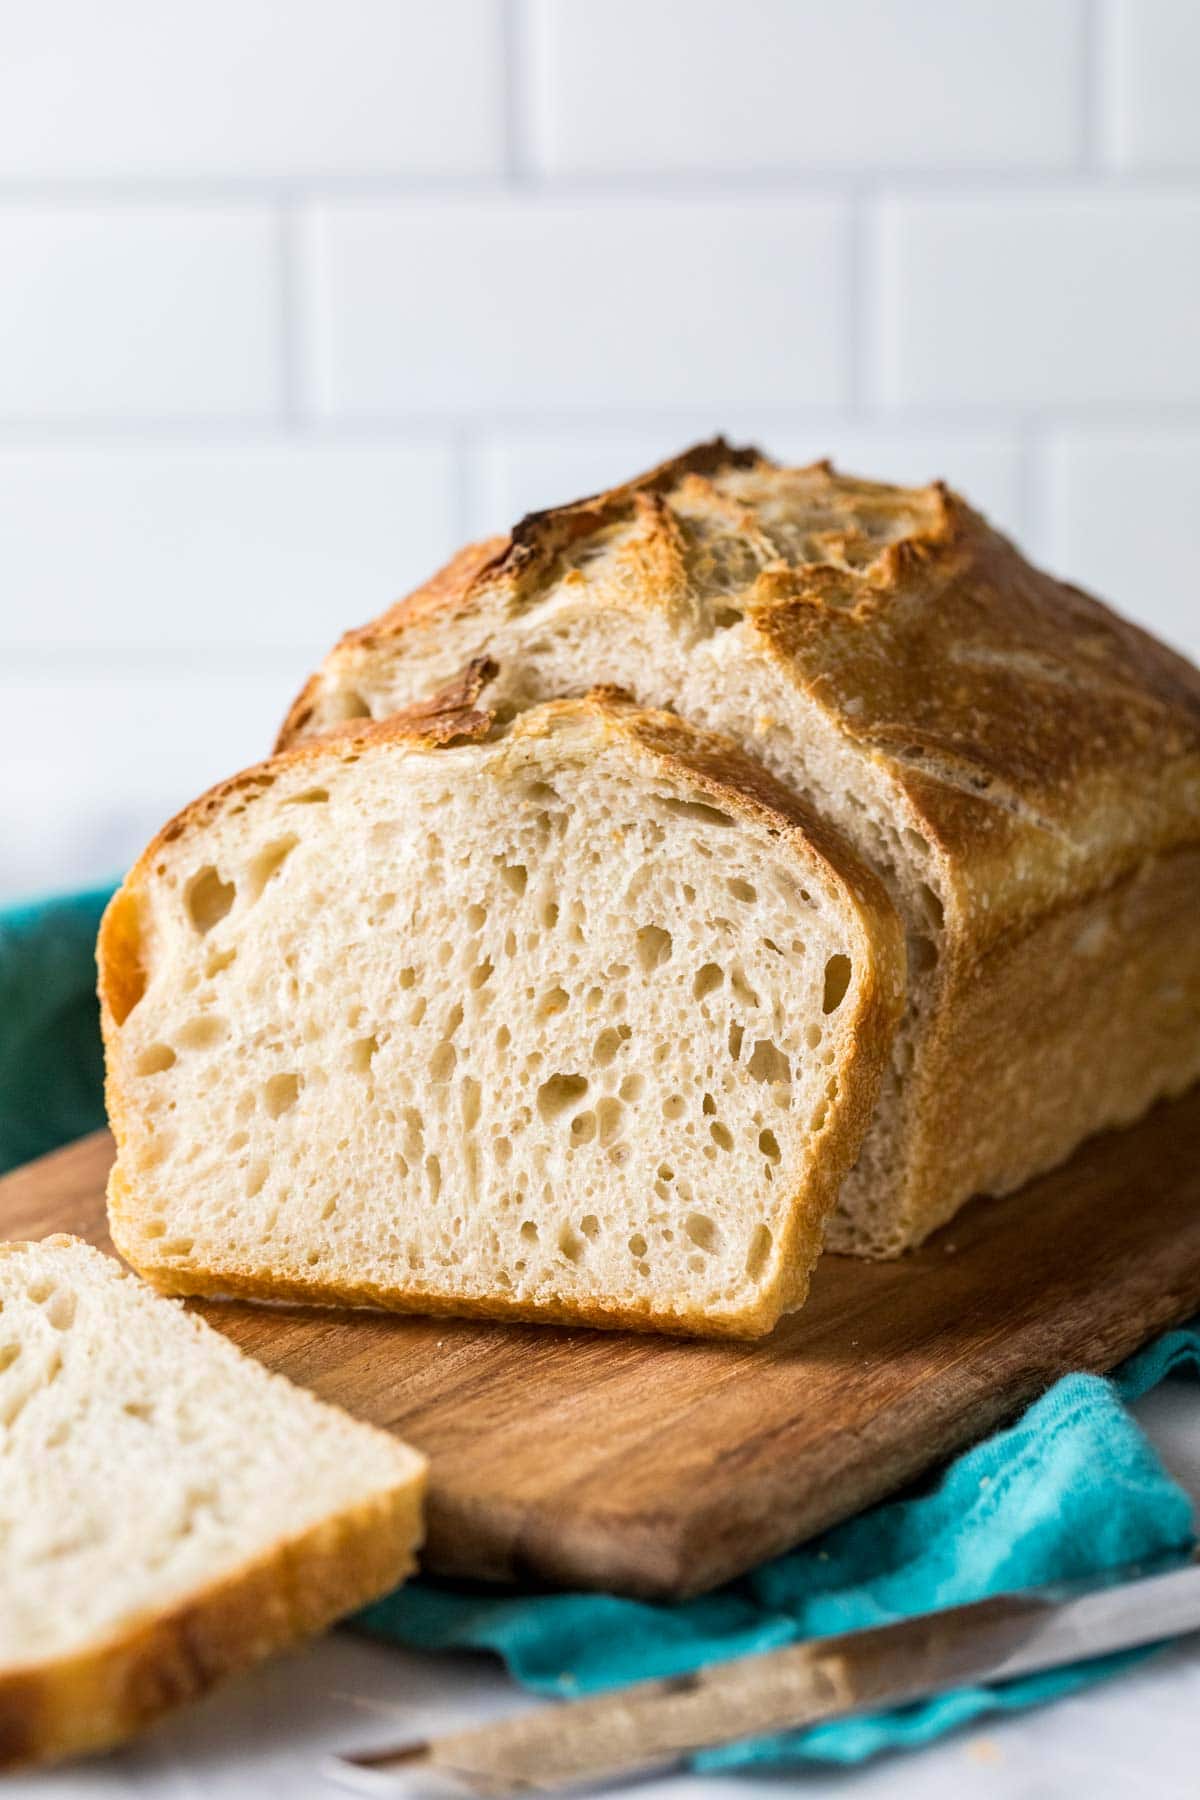
My easy homemade sourdough bread is the only bread we eat in my household anymore. In fact, I make 2-3 loaves a week and keep a stockpile in my freezer at all times (handy for making sourdough homemade croutons and breadcrumbs)! And once you try it… well, I think you will, too.
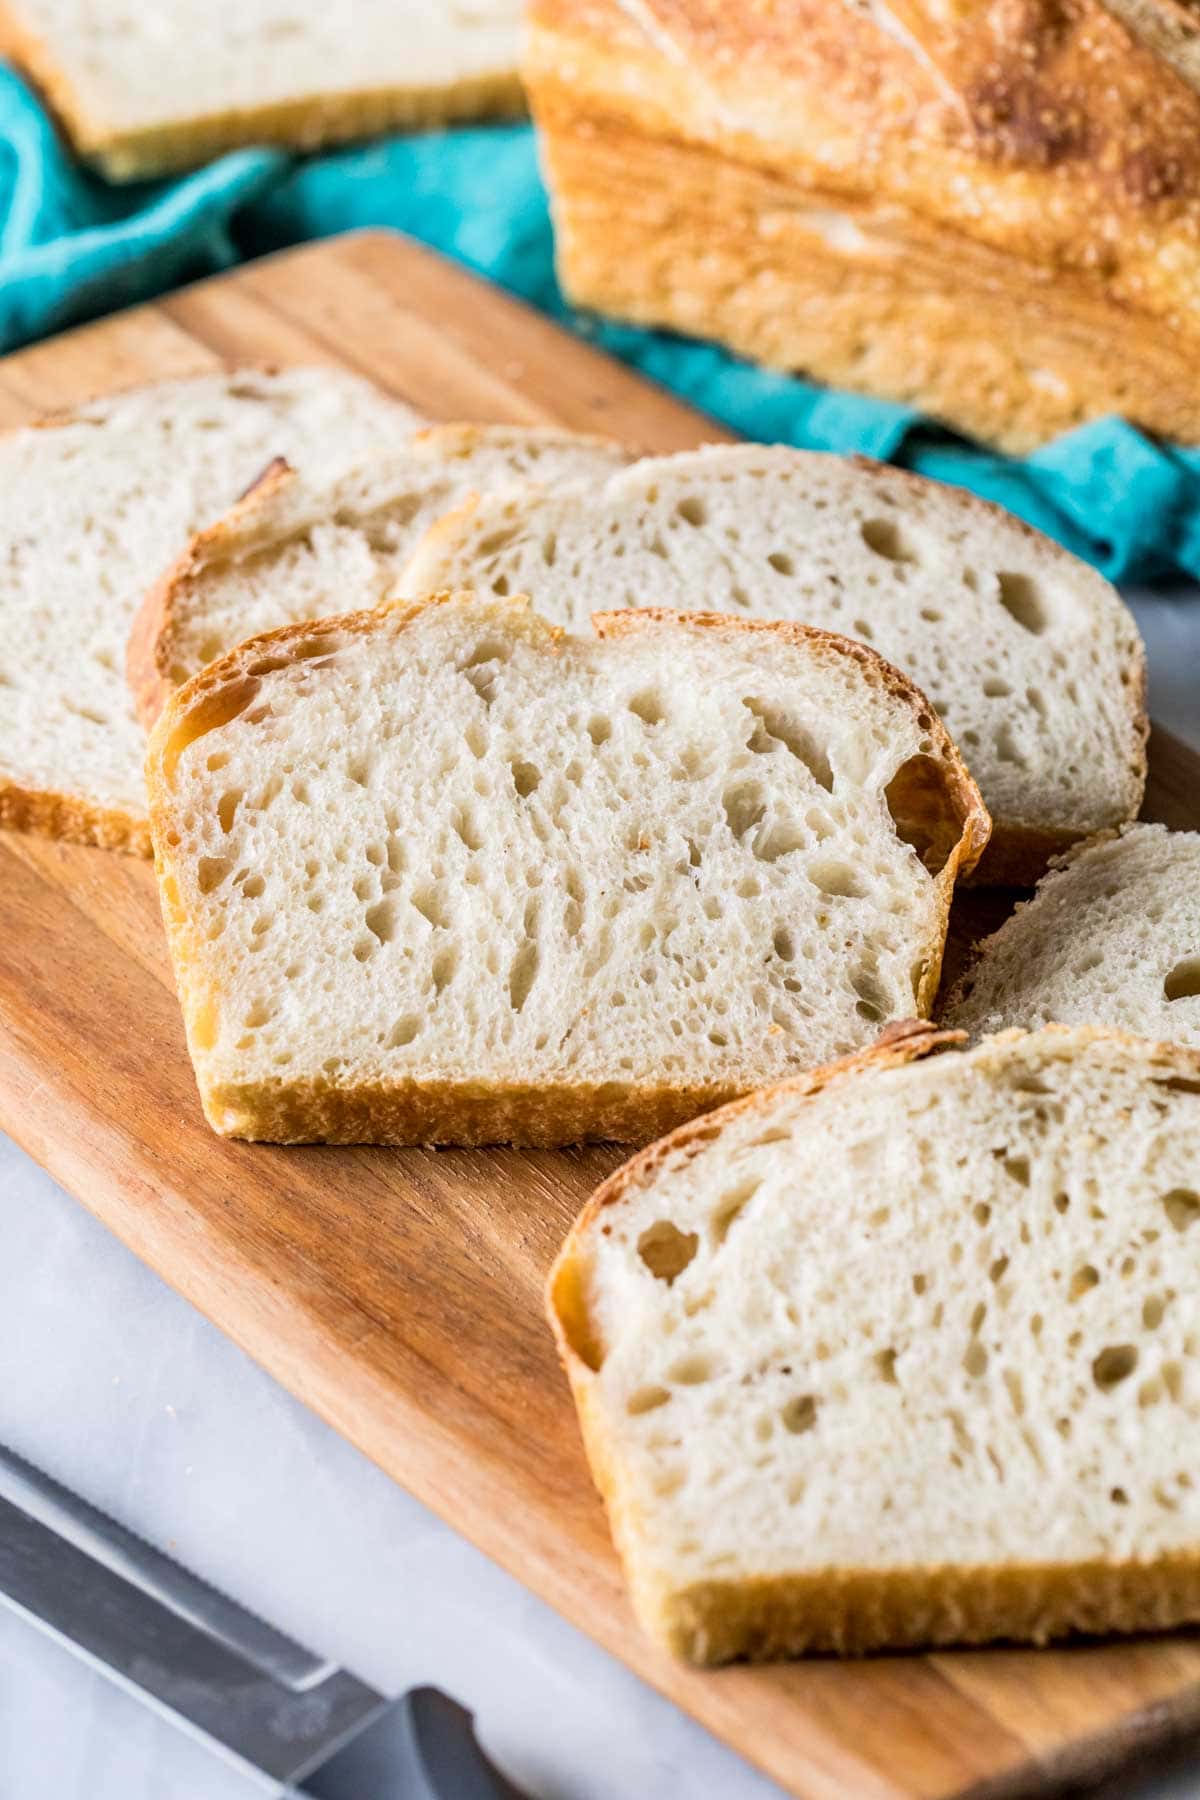
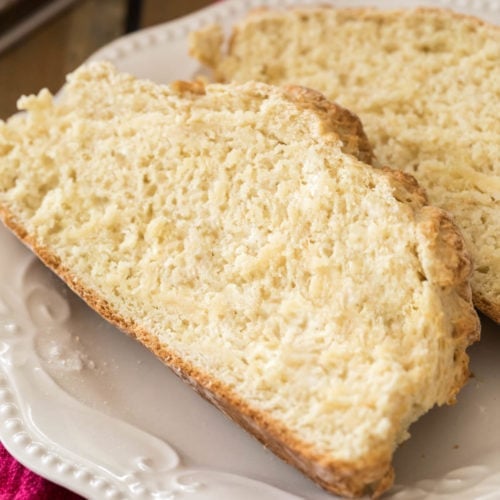
That’s because there’s a lot to love about sourdough bread. First and foremost, it has a high nutritional value and none of the additives (no added sugar, either) you’ll find in most store-bought breads. It also tastes amazing: classic, hearty bread (that’s not overly sour) with a thick, crusty exterior and a soft, springy interior.
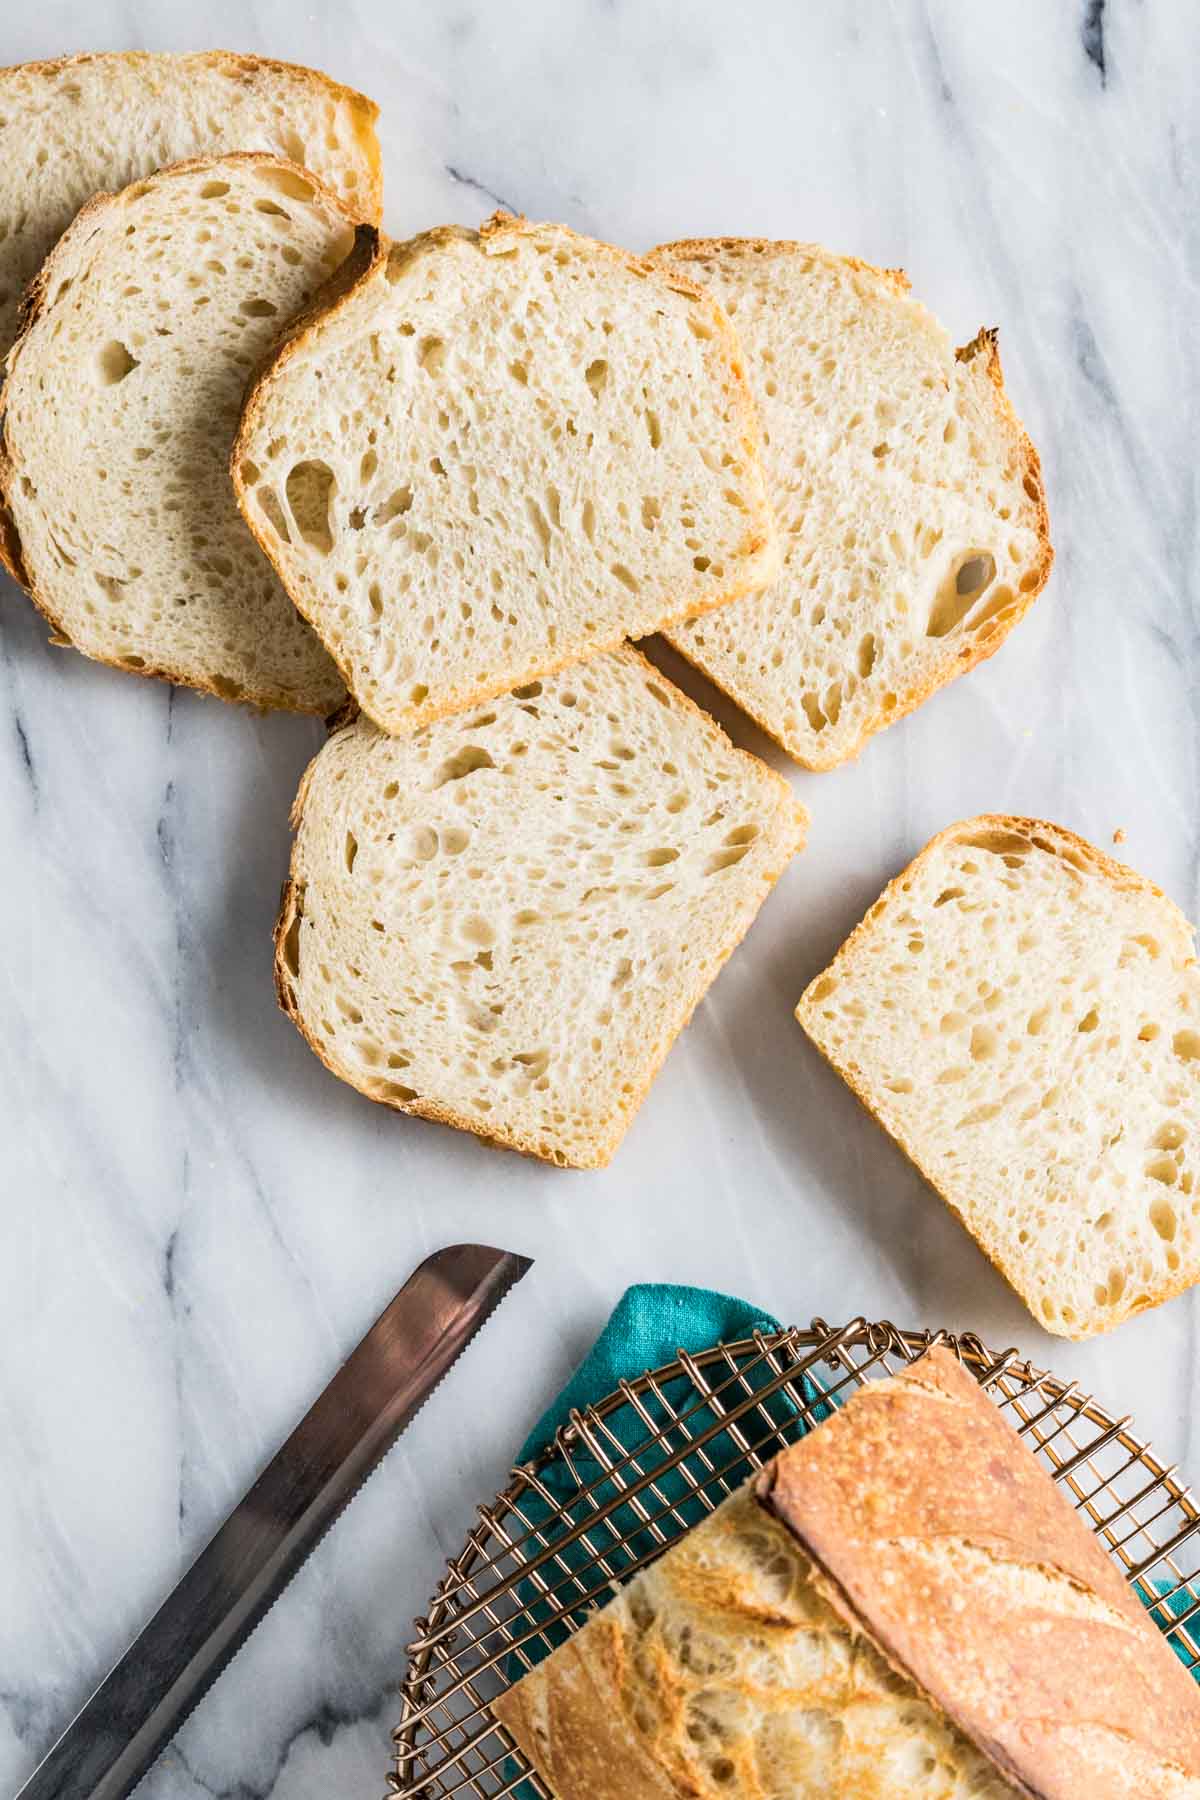
But what I think you’ll love most about my recipe is how wonderfully versatile it is. It’s ideal both for dipping in soup, serving as a side with a salad, or using as a sandwich; it also makes an awesome grilled cheese that pairs beautifully with my tomato soup!
Homemade Sourdough is Easier Than You Think!
Making sourdough bread at home is shockingly easy, especially if you use the sourdough starter I shared last week. It is time consuming and you must have patience, but the work itself is very approachable and I wanted to share a version that was easy to follow–perfect for beginners and advanced sourdough bakers alike.
There’s no kneading involved; instead, we’ll use the easy process of stretching and folding, which develops the gluten much like kneading would, but is better suited for higher hydration dough like sourdough. There’s also no mixer or fancy equipment needed with my recipe — you don’t even need a banneton or a Dutch oven, just a pair of bread pans!
Let’s get started (and after you try it, pat yourself on the back and leave me a comment to let me know how you like it!).
What You Need
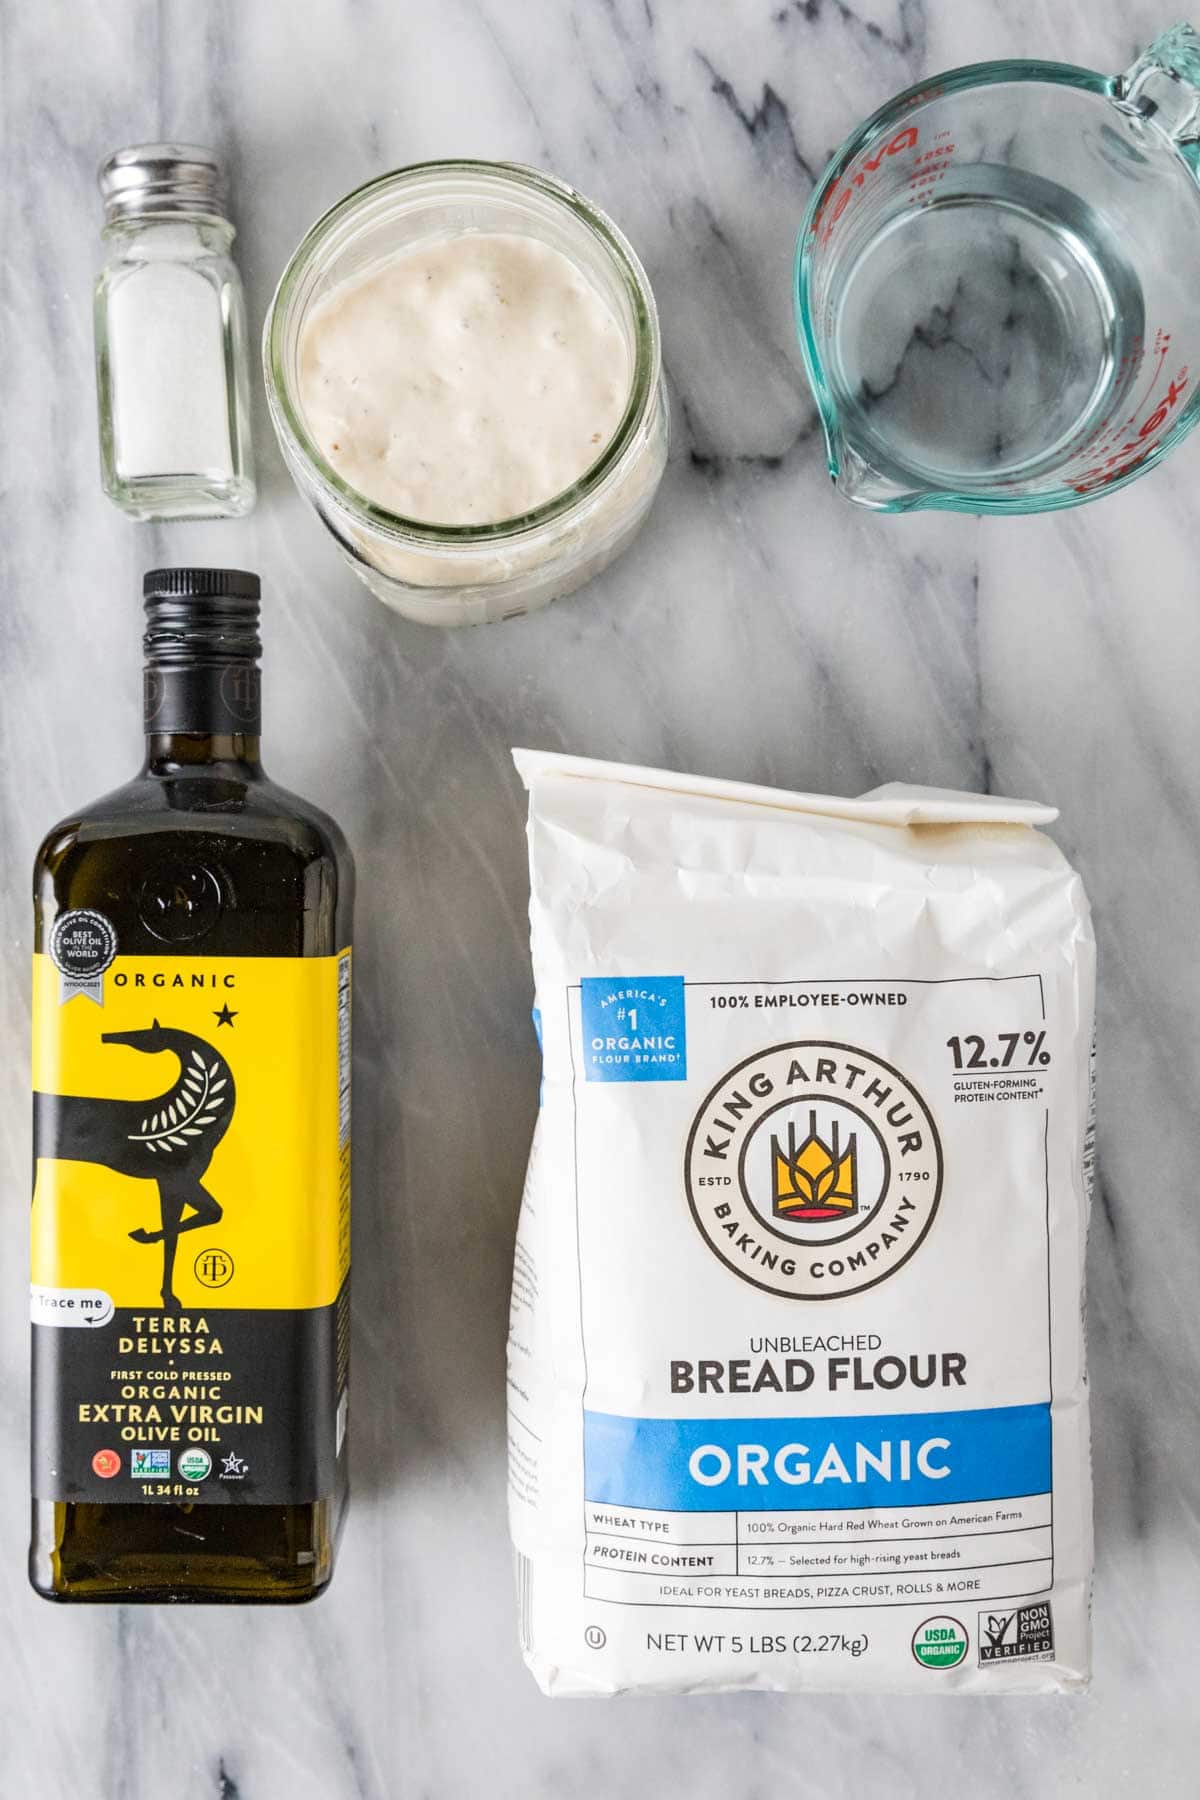
- Sourdough starter. This can be homemade or store-bought. Obviously, I recommend making your own by using my sourdough starter recipe (this does take over a week to prepare, but it’s worth it!).
- Bread flour. I really recommend bread flour over all purpose for my sourdough bread recipe. Bread flour has a higher protein content and produces a better-crumbed sourdough bread, in my opinion. If you don’t have it, all-purpose is not as great but will be “fine”, but try it at least once with bread flour.
- Olive oil. A bit of olive oil helps make the bread perfectly chewy and soft. I also find it keeps my sourdough softer longer.
- Salt. Salt is critical for flavor (unsurprisingly) but it also plays some other important roles in sourdough bread. It helps balance the acidity from our starter, strengthens the gluten in the dough (important for shape and texture), and it even helps extend the shelf life of the bread by acting as a natural preservative. Don’t let anyone tell you it’s going to hinder your yeast, it won’t (or at least won’t to any noticeable degree and your sourdough will be worse off without it).
- Water. The water called for in my recipe will yield a sourdough loaf that is about 70% hydration. I love this hydration level; it produces a crumb that’s neither too dense nor too open, that’s not too sour but is still flavorful, and that is easy to shape and extremely versatile — we use it for everything from dipping in pot pie soup to eating sandwiches. Once you’re comfortable baking a bread at this hydration level, you can experiment with increasing the water if you’d like. More water usually yields a bread with a more open crumb, a more tangy flavor, and a crumb that’s less suitable for sandwiches but good for dipping.
I wrote this sourdough bread recipe with weights because I find it’s the easiest way to make it (just like with my macaron recipe); however, I have included cup measurements as well.
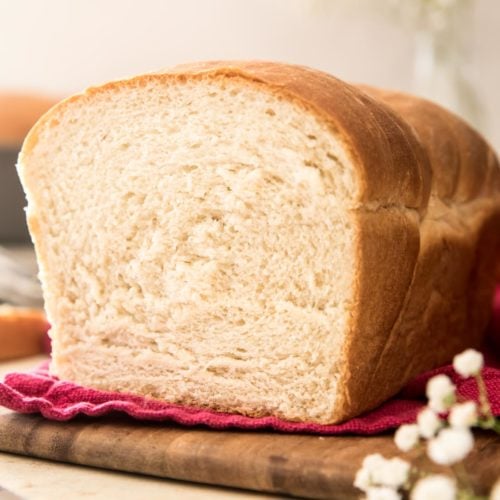
SAM’S TIP: While some people like to bake their sourdough bread in a dutch oven, I like to use a pair of bread pans. It doesn’t look as rustic this way, but it’s much more practical for my family to have a loaf of bread rather than a round of it. If you’re team Dutch oven, don’t worry–I provide instructions for how to make sourdough bread in a Dutch oven below.
Remember, this is just an overview of the ingredients I used and why. For the full recipe please scroll down to the bottom of the post!
How to Make Sourdough Bread
Make the Dough
The first 4 steps in my sourdough bread recipe are the “autolyse” period (or sometimes called an “inclusive autolyse” because we are incorporating all of our ingredients at this point). This step helps boost fermentation, improves the texture (more open crumb!) and flavor, and makes the dough easier to work with.
Note that I do, quite intentionally, include salt in this first step. Some bakers argue that salt will inhibit the yeast growth and negatively impact the crumb. Not so! With the duration of this autolyse and the composition of this particular sourdough bread recipe adding salt at this stage does not make a difference. Leaving it out for this step only makes it more difficult to incorporate later and increases your likelihood of accidentally forgetting to add it altogether (which would be a shame!).
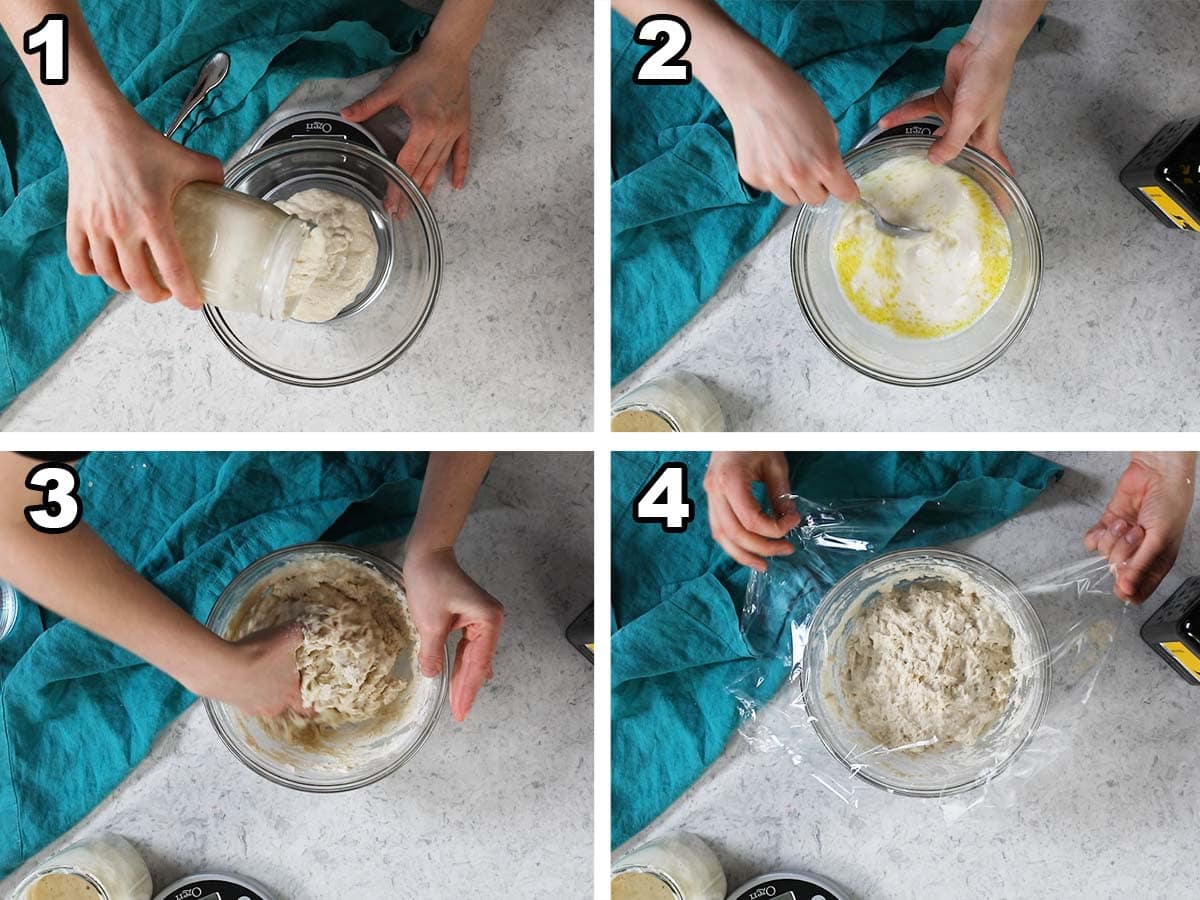
- Combine sourdough starter, water, and oil in a large bowl. Make sure your starter is active and bubbly before adding it.
- Add the bread flour and salt.
- Stir until mostly combined (your dough will still look shaggy). Do not over-mix!
- Cover and let sit at room temperature for one hour.
Stretching & Folding Your Sourdough
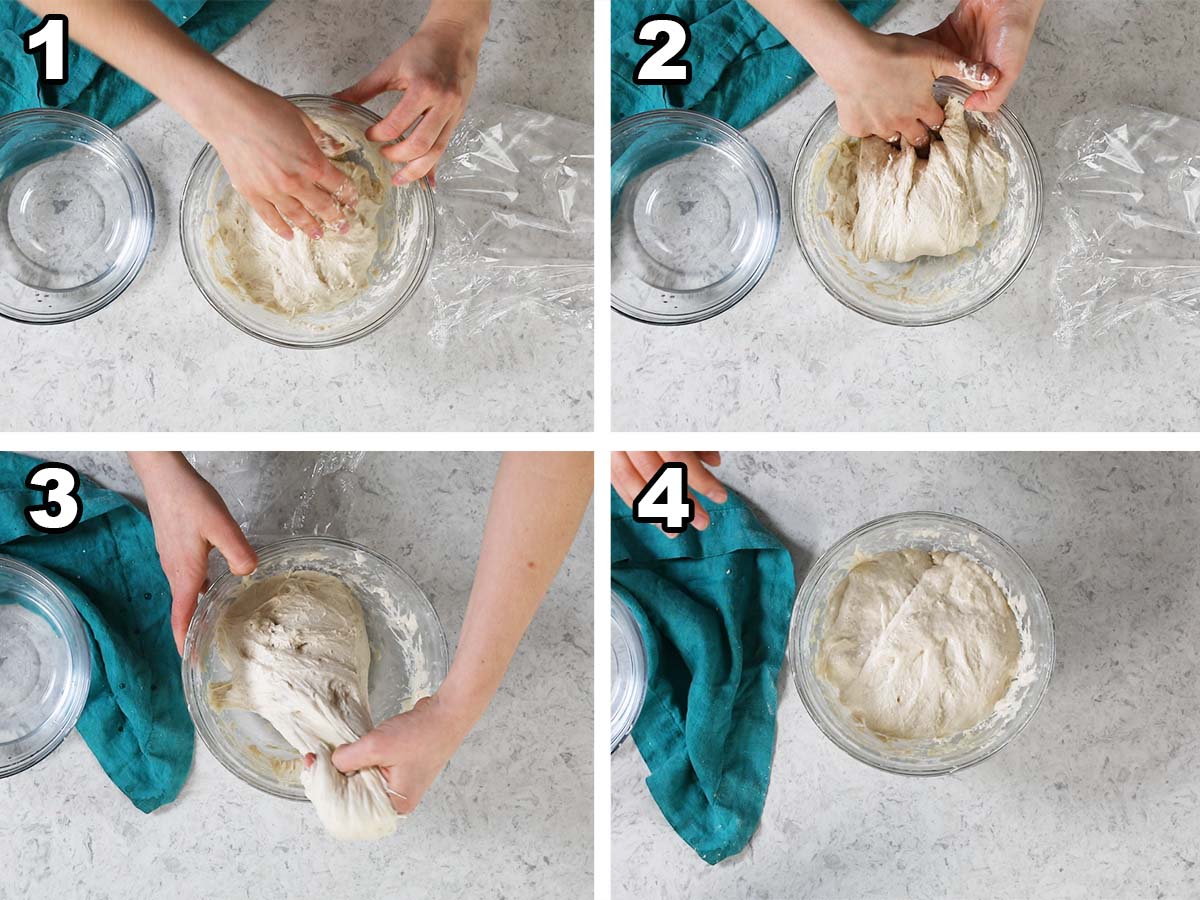
- Form your dough into a ball using your hands, the run your hands under cool water.
- Stretch the top of the dough up and over the bottom, then turn the dough 90 degrees and repeat. I demonstrate this in the video below if you need a better visual.
- Repeat the stretch and fold process a total of four times, then cover and place in a warm place to rise for 30 minutes.
- Let your dough rise until increased in size by 80%, repeating the stretch and fold process every 30 minutes.
Assembling
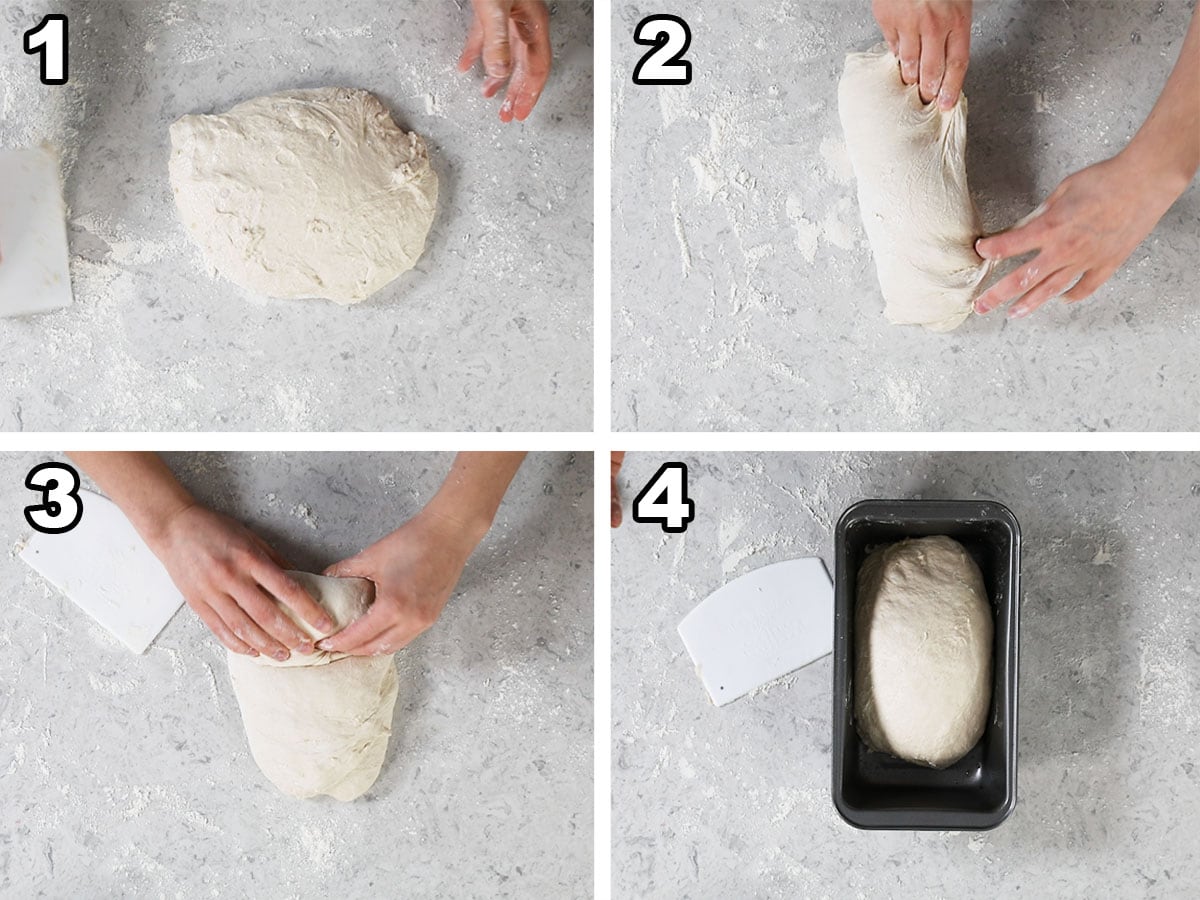
- Deflate and form your dough into a rectangular shape on a lightly floured surface.
- Lift the right side of the dough, fold it over to the center, then repeat with the left side (like folding a paper in thirds).
- Roll into a tight log starting with the short end of the rectangle, then tuck the ends under.
- Place in a greased bread pan, cover loosely, and place in the fridge to rest overnight.
SAM’S TIP: I recommend proofing your dough in the refrigerator overnight rather than baking right away (I also provide instructions for baking right away, though). Proofing overnight will help develop the flavor, help the bread rise better, and encourage more fermentation. That being said, I don’t like to let my dough sit in the fridge for longer than 48 hours (absolute max) before baking. Letting it sit too long can cause over-proofing and can compromise the final texture of your sourdough bread. I also don’t freeze my dough before baking, so I can’t advise on that.
Baking
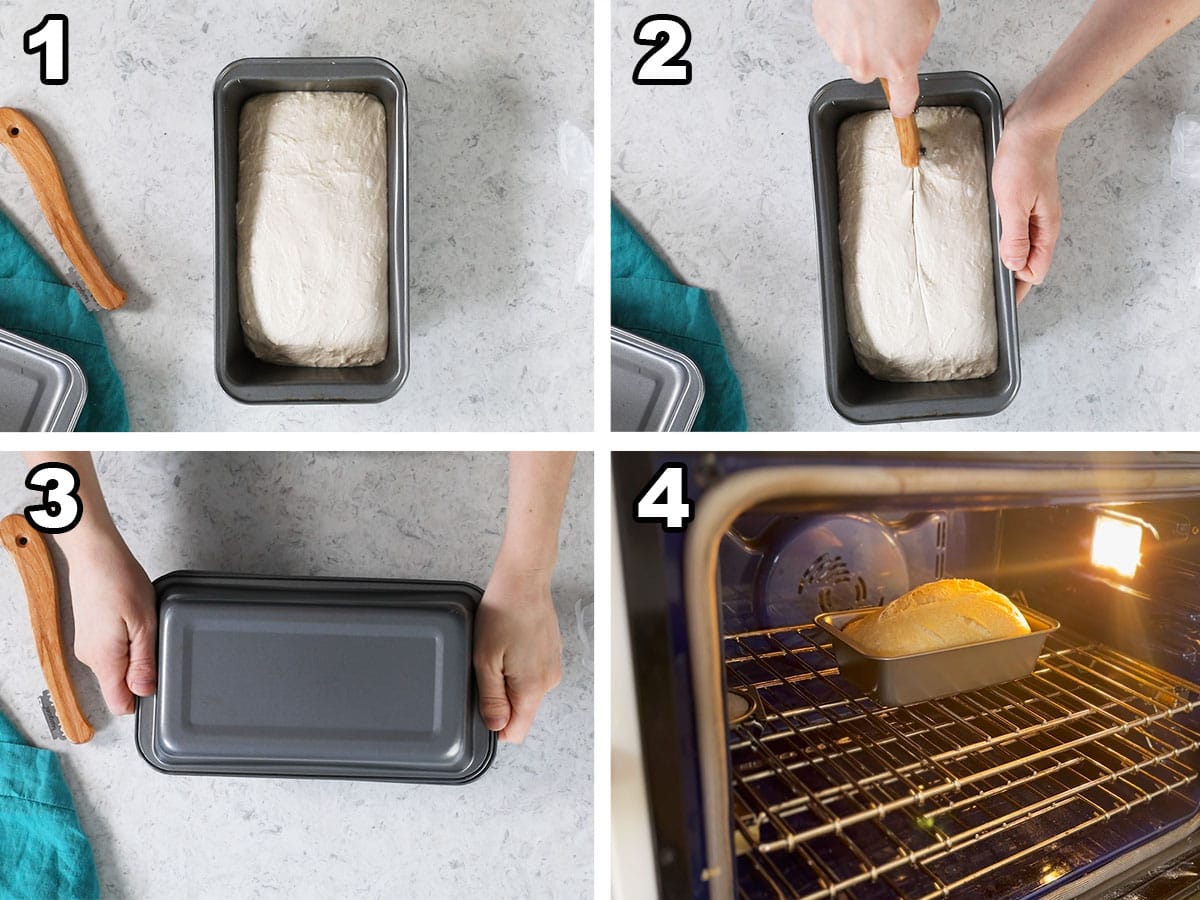
- Let the dough rest at room temperature while your oven preheats.
- Score the bread about ¼″ deep down the center.
- Cover with another bread pan or an aluminum foil tent.
- Bake at 450F for 30 minutes, then remove the cover and bake for 20-23 minutes or until the bread reaches an internal temperature of 206F (97C).
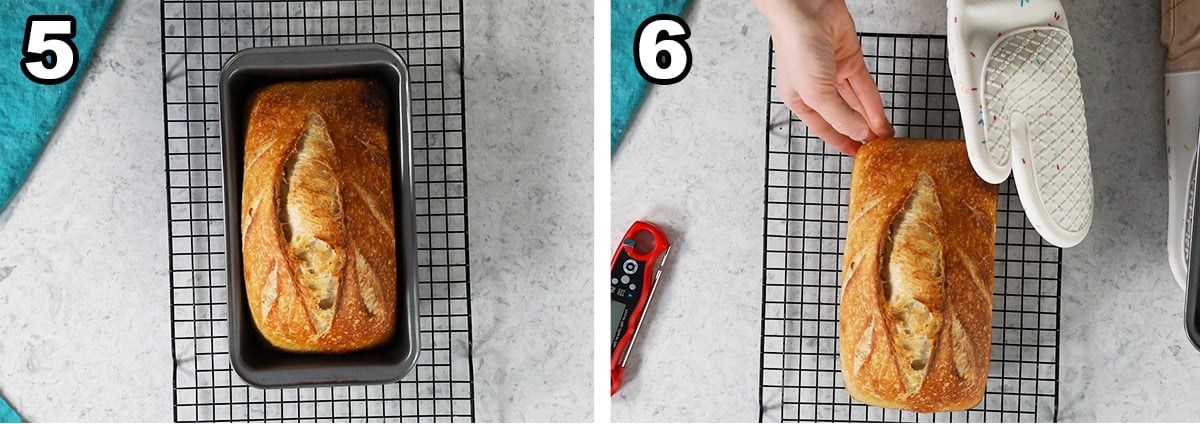
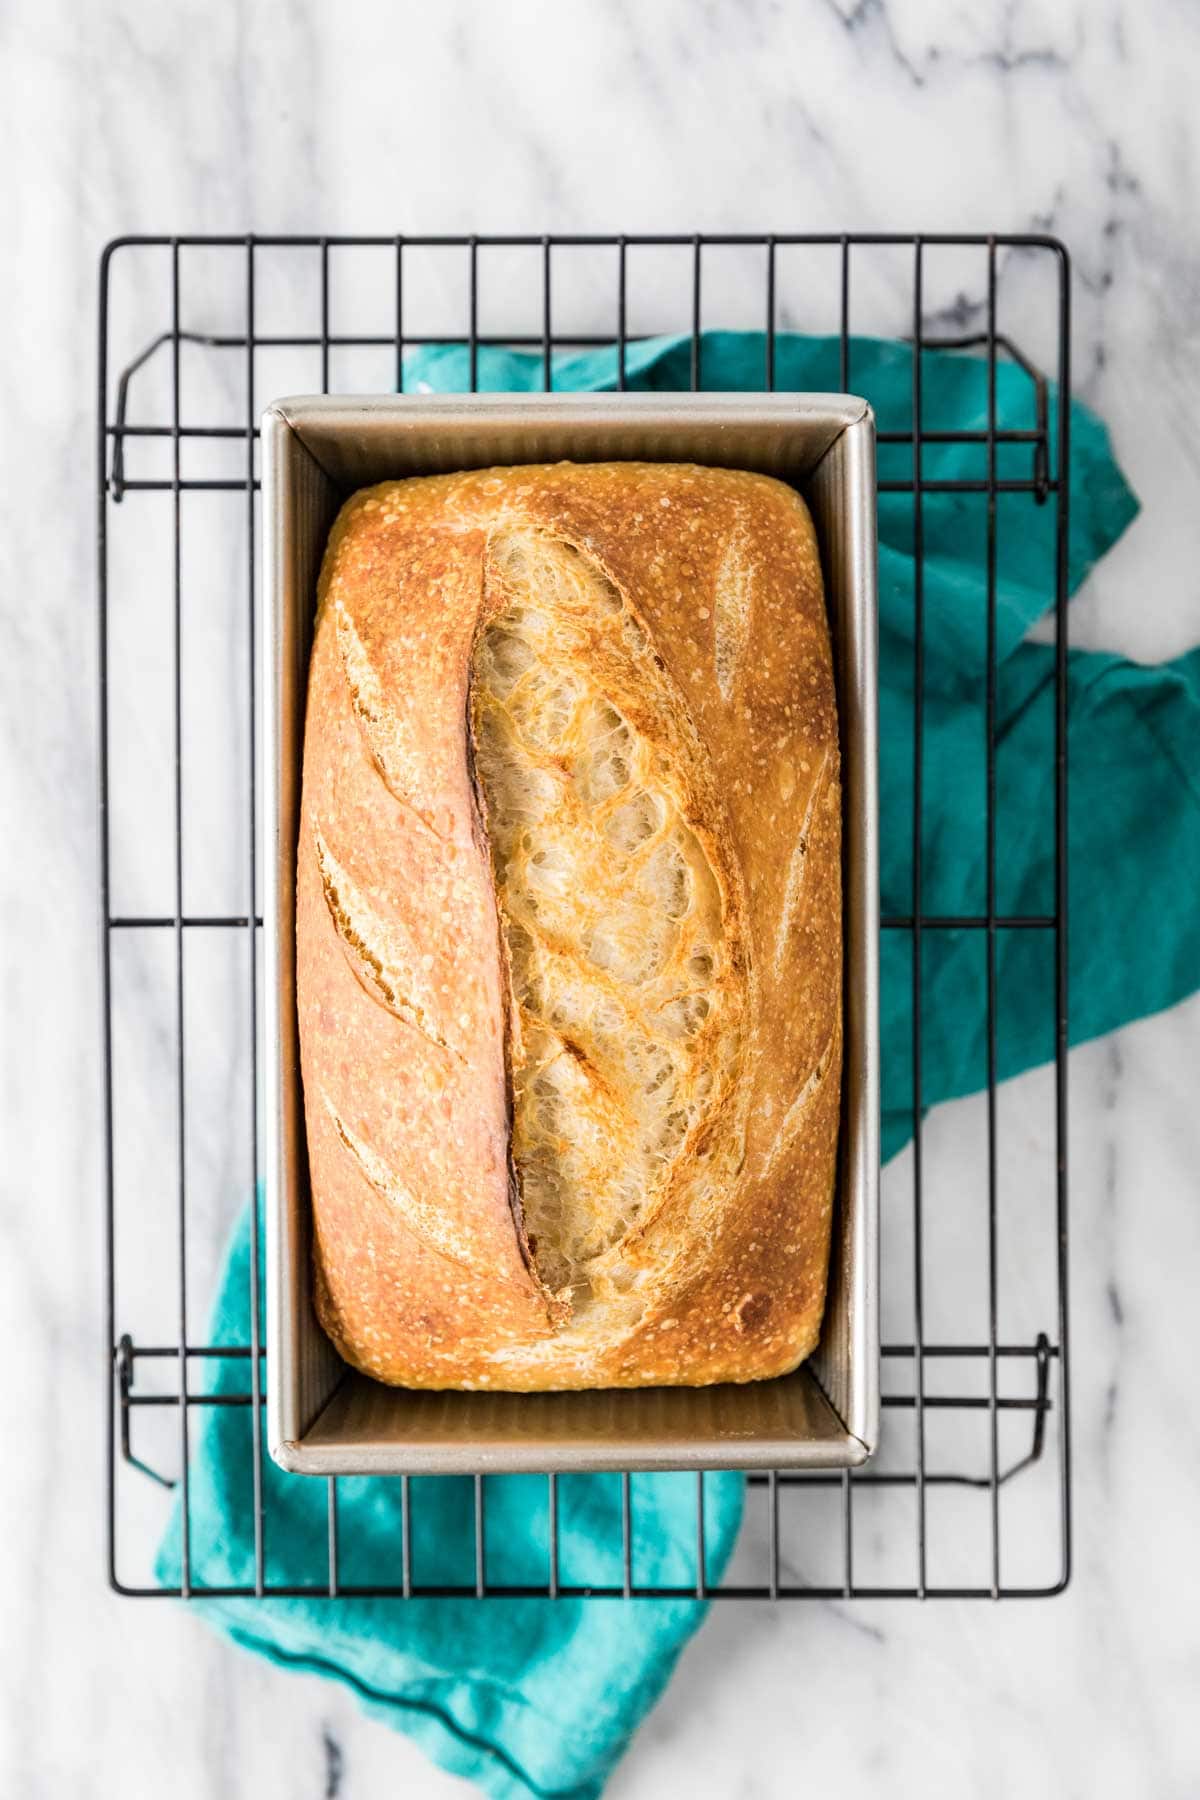
- Let the bread cool in its pan for 15 minutes.
- Remove the bread from the pan (carefully, it’s still hot!) and place on a cooling rack. Don’t let it sit in the bread pan too long, or your sourdough bread could end up soggy from the steam that it releases in the pan that can’t escape. Once removing to a cooling rack, allow the bread cool completely (or at least almost completely) before slicing.
SAM’S TIP: Don’t cut into the bread while it’s still warm (I know, so hard, so tempting!). Doing this can make your loaf gummy and dense.
Frequently Asked Questions
Sourdough is definitely one of the more nutritious types of bread. It’s prebiotic-rich, made by fermenting dough with wild yeast and bacteria (sounds not-so appetizing but in reality is delicious) and is more digestible than your standard white bread. It also has a lower glycemic index and less gluten than normal bread. If you’re going to be indulging in bread, this is arguably a better option than standard white bread.
While a traditional sourdough bread recipe is obviously not gluten free, sourdough bread is sometimes tolerated by people who are gluten sensitive (but not people with Celiac Disease). This is because some of the gluten is consumed during the fermentation process, which makes the bread more easily digestible.
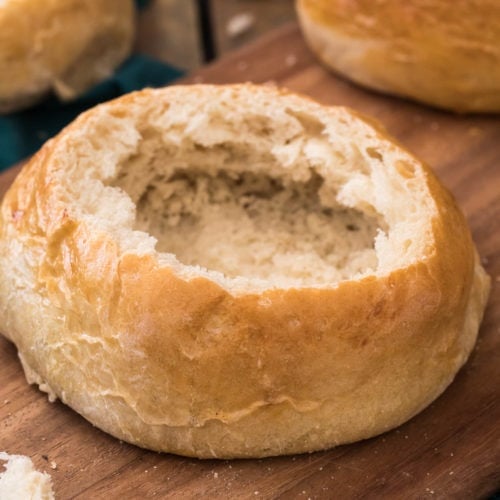
Yes, of course! I wanted to share an easy sourdough bread recipe that can be made with basic kitchen equipment, but you can just as well use a Dutch oven. Follow the written recipe through the rolling and tucking step, then place the dough in a lightly floured banneton (I use my Kitchenaid mixer bowl lined with a lightly floured kitchen towel, because I don’t actually have a banneton). Cover and let rise overnight in the fridge.
The next day, carefully turn out your dough onto a large piece of parchment paper and carefully lower this into a 4.5qt Dutch oven (a larger one would work, but your bread will be flatter and will likely cook faster). Allow the dough to sit uncovered while the oven preheats, then score, cover with a lid, and follow recipe instructions for baking.
You can preheat your Dutch oven (as I do in my artisan bread recipe) to make it nice and hot before adding your dough if you’d like, but honestly I rarely do this step with this recipe.
I know that there are many sourdough bread recipes out there and so many different ways to make it, but this is my personal favorite version that I’ve carefully developed over the past year. I can’t wait to hear how you like it (let me know in the comments!), I hope you’ll always want to keep a loaf in your house, too! ❤️
Enjoy!
If you try this recipe, be sure to tag me on Instagram, and you can also find me on YouTube and Facebook
Sourdough Bread Recipe
Ingredients
- ⅔ cup (150 g) active starter bubbly, active, fed
- 1 ⅓ cups (315 g) warm water 90F
- 1 ½ (18 g) Tablesoons olive oil
- 3 ⅔ cups (450 g) bread flour
- 2 teaspoons (13 g) table salt
- Oil for greasing pan
- Additional flour for dusting work-surface
Recommended Equipment
- Bread lame (optional, or use sharp knife)
Instructions
- In a large mixing bowl, combine sourdough starter, water, and olive oil. Stir until combined.⅔ cup (150 g) active starter, 1 ⅓ cups (315 g) warm water, 1 ½ (18 g) Tablesoons olive oil
- Add bread flour and sprinkle salt overtop. Use your (clean) hands or a wooden spoon to stir together until dough is mostly combined. It will still be a bit shaggy and should not be cohesive (don’t over-mix) but no dry patches of flour should remain.3 ⅔ cups (450 g) bread flour, 2 teaspoons (13 g) table salt
- Cover bowl with plastic wrap and let sit undisturbed for one hour (this is the “autolyse” period).
Stretch & Fold
- Form dough into a ball with your hands.
- Run your hands under cool water (prevents sticking!) and grasp the top of the dough and stretch it over the bottom. Turn the dough 90 degrees and repeat. Turn 90 degrees and repeat again, then once more (four total stretch & folds).
- Allow dough to rest, covered, in a warm place for 30 minutes.
- Repeat step 2 above every 30 minutes as dough rises.
- Allow dough to rise (stretching and folding every 30 minutes as indicated) until dough has increased in size about 80% (how long this takes depends on the temperature of your kitchen, typically mine is ready within 4-6 hours).
Forming the Dough
- Lightly grease a 9×5 loaf pan (with olive oil or butter) .Oil for greasing pan
- When dough has risen sufficiently, turn it out onto a clean, lightly floured surface.Additional flour for dusting work-surface
- Use your hands to gently deflate the dough and pat it into a rectangular shape. Lift the right side of the dough and fold it into the center (almost as if you were closing a book). Then, lift the left side of the dough and fold it over the first fold (use a bench scraper if the dough is sticking to your counter).
- Starting with a skinny end, tightly roll the dough, as if you were rolling up a cinnamon roll. Tuck the ends under and carefully transfer to prepared bread pan. Don’t worry if the bread doesn’t fill the pan right now.
- Cover pan tightly with plastic wrap and transfer to the refrigerator to rest overnight/for 12-24 hours.
Baking
- Remove sourdough from the refrigerator and preheat oven to 450F. Let oven preheat and dough rest (covered or uncovered) for at least 30-35 minutes before proceeding.
- Once oven has preheated, uncover bread, make a clean slice (about ¼” deep) down the center with a sharp knife or bread lame (to score it) then cover with another 9×5 pan (if you don’t have a second pan, you may instead make a makeshift oven using aluminum foil; tent it as high as the bread pan is deep).
- Transfer to center rack of preheated oven. Bake, covered, for 30 minutes then remove the lid and continue to bake another 20-23 minutes/until golden brown and the center of bread reaches 206-208F (97C).
- Allow bread to cool in pan for 15 minutes before gently turning it out onto a cooling rack (careful, the pan will still be hot!) to cool for at least 1-2 hours (until it no longer feels warm) before cutting into it.
Notes
To bake the same day:
Follow recipe through step 4 under the “Forming the Dough” section. Immediately after transferring dough to pan, preheat oven to 450F (230C). Allow dough to rest uncovered while oven preheats, at least 30 minutes. Once oven is preheated, follow directions in recipe starting with step 2 under the “Baking” section. Note that bread will not be as flavorful or nutritious & texture will not be as great if it is not allowed to sit in the fridge overnight.Storing & Freezing
Store in an airtight container at room temperature for up to a week. You may also freeze this bread. Freeze the whole loaf by wrapping tightly in plastic wrap and then wrapping in foil. When ready to thaw, keep covered completely and defrost at room temperature before unwrapping. We prefer to freeze pre-sliced: Cut bread into slices and storing in a plastic Ziploc bag (remove as much air as you can before freezing). If you struggle with freezer burn or plan to freeze the bread longer than a few weeks, you can individually wrap each slice in plastic wrap before closing in the plastic bag.Nutrition
Nutritional information is based on third-party calculations and should be considered an estimate only. Actual nutritional content will vary based upon brands used, measuring methods, cooking method, portion sizes, and more.


Val
Amazing recipe! Turned out great! Wondering if you have tips for making smaller loafs?
Sam Merritt
I’m glad you enjoyed the bread, Val! I haven’t made it in a smaller loaf so I can’t say exactly how to alter the recipe to fit in different pans.
Laurie Lehman
I just finished baking this loaf about an hour ago. It looks amazing! I’m really happy to have found this bread recipe to make in a loaf pan. I like your thoughts of nicer for slicing for sandwiches, toast than a boule. I’m fairly new on my sourdough journey and haven’t made too many loaves but this recipe I think will be my go to for sure! I will cut into it and have a slice with my minestrone soup tonight. Can’t wait! Wish I could attach a pic of my loaf. I found the dough so nice to work with during the folding process.
Emily @ Sugar Spun Run
Thanks for letting us know how it went for you, Laurie! We’re so happy you enjoyed the recipe 😊
Suzanne
Is it okay to use the loaf pans you recommend in a 450 oven? The pan instructions advise a max oven temp of 428. We LOVE this sourdough bread recipe — so tasty!
Sam Merritt
Hi Suzanne! The pans I have can handle the heat, but I can’t speak to what your pans can handle.
Suzanne
The pans I ordered are the ones you recommend in your list of supplies needed, and the instructions for those pans say the maximum temp should be 428. So I was wondering if those are really the loaf pans you recommend. If not, which ones?
Sam Merritt
Personally I use these pans and have not had a problem. 🙂
Cyndi Mac
I have tried multiple sourdough bread recipes. This is one of my favorites!
Emily @ Sugar Spun Run
We’re so happy to hear that, Cyndi! Enjoy 🙂
Deborah
I’m a little confused by the recipe. So are you actually doing much more than the initial 4 stretch & folds? Letting the dough increase by 80% and repeating the stretch & folds….it says 4-6 hours? Just hoping for clarification. I guess we’re not letting the dough rise in the bread pan at room temp? I feel so dumb, like no one else has asked these questions!!
Sam Merritt
Hi Deborah! You will do each stretch and fold process 4 times. You want the dough to increase in size about 80%. This process will take about 4-6 hours. You do the 4 stretch and folds every half hour. I hope that helps clear it up. 🙂
Sarah
I’m currently making this recipe. I got through the stretch and folds but then it was way to shapeless to do anything with. It was super sticky and moist. What did I do wrong?
I’ve only cooked rustic loaves up until now and haven’t had a problem. Trying to learn.
Sam Merritt
Hi Sarah! It sounds like things are going well. It is going to be sticky and rather formless. It will hold shape when dropped into the loaf pan and baked. Enjoy! 🙂
Brittany
I’ve made this several times now and it’s a great recipe!! I’ve started using different flavored oils to boost the flavor of my bread and it’s so yummy!! Thanks for the recipe!
Emily @ Sugar Spun Run
Yum! So glad it’s a hit for you, Brittany 🥰
Susan Dearolf
i only have 8X4 loaf pans. Should I put half a loaf in each or will it work out just fine?
Sam Merritt
Hi Susan! I think I would just bake it in the pan. Your bread will be a little bit taller and may need a little more time, but if that’s all I had, that is how I would do it. 🙂
Deb
Bought a starter late in the summer & am just finishing up my 3rd time using this recipe. I don’t care for sourdough bread, but my guy does & he loves this recipe. I love making it & love that it goes into loaf pans! It’s a win-win for us here! I am so glad I found this recipe! Thanks
Emily @ Sugar Spun Run
Thanks for using our recipe, Deb! So glad it’s the perfect fit for you 🙂
Jibrat
Make this bread at least once every week. I only succeed with sugarspunrun recipes she’s a godsend!!
Emily @ Sugar Spun Run
We love hearing that! 🩷
Heidi Cavagnaro
Love this recipe yummy
Martha Crawford
I just started making sourdough a few months ago and love this recipe for sandwich bread.
My question is that since I’m in Colorado at 6600 ft elevation, do I need to do anything different when making it? I’m never quite sure how many times to do the stretch and fold before putting it in the refrigerator overnight. It has turned out well a couple of times but my last loaf was a bit dense. The temp in my house is usually around 68-70 degrees.
Thank you!
Emily @ Sugar Spun Run
Hi Martha! Unfortunately we don’t have experience with high altitude baking. Hopefully someone who does can chime in 😕
Cynthia L Richter
I made my bread in glass rectangular pans (using 2 the like a Dutch oven), and they got overly crusty all around and I covered with foil last 10 minutes. I kept trying to get inside temperature to 203 but finally took it out at 200. It was done but too crusty all around, but the inside tasted fine. Any recommendations? Thank you, Sam, for your recipe.
Sam Merritt
Hi Cynthia! Glass pans can be tricky, the interior can take a lot longer to get to temperature while the outside can brown faster than the bread can bake through. Do you have any metal pans? That would be my recommendation.
Amy de la Mora
Hi Sam!
I’ve just started making sourdough bread and so far, your recipe has been the best. My whole household agrees, its the lightest, tangiest and chewiest…. Here’s my question, I want to make a boule in my Le Creuset dutch oven– that’s bigger than a regular loaf pan, right? Do I need to alter your recipe and add more flour etc? If so, how much? Thank you!!!
Sam Merritt
Hi Amy! I actually have instructions for baking in a dutch oven in the frequently asked questions section. 🙂
Kathleen Horner
This recipe is absolutely marvelous. I’ve been at sourdough for about six months now and this loaf had the right sour taste, soft texture, a generous rise, and luxurious crust. I’m ready to try it in a boule, too. Thank you!