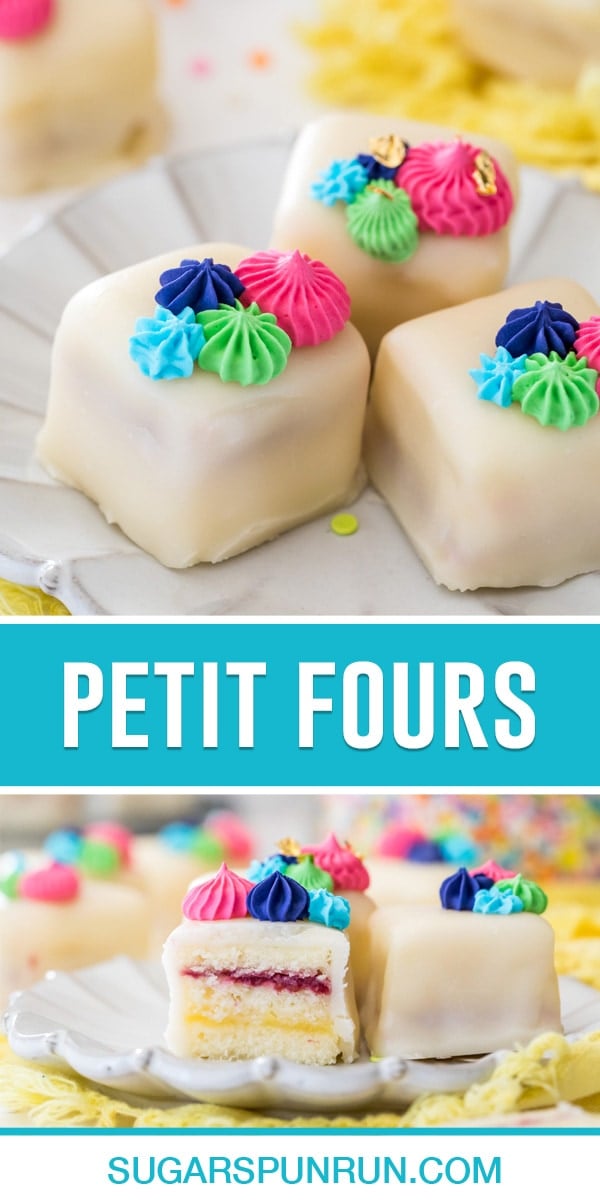
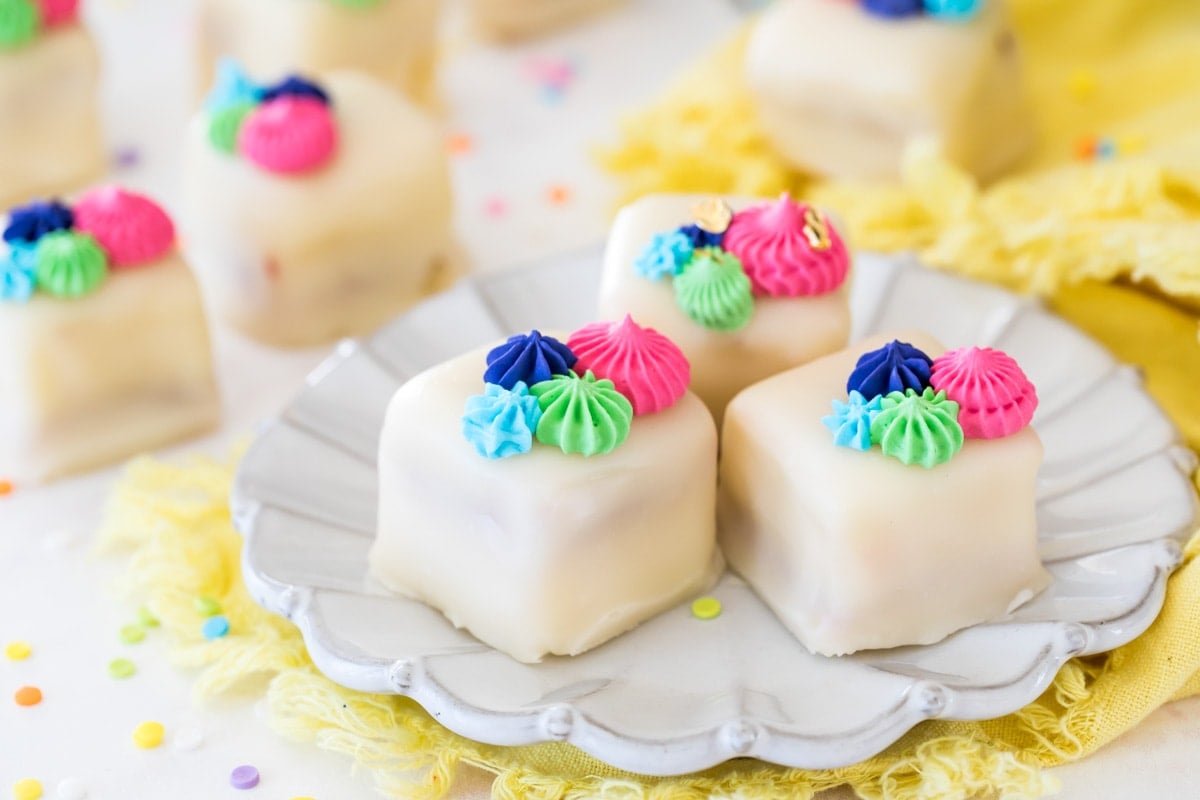
Petit Fours are dainty French cakes perfect for serving at bridal showers, tea parties, or anytime! My carefully tested recipe is the BEST and easiest way to make these sweet treats at home. Recipe includes a how-to video!
Precise and Pretty Petit Fours, Made Easy
Petit Fours (translates to “little oven” in French) are quintessential tea party and bridal shower treats. While they have a reputation for being fussy and difficult, I’ve developed my recipe to be as simple as possible. We’ll use a sturdy, but soft, cream cheese version of my favorite pound cake (it’s actually a bit closer to my well-loved bundt cake) to create beautifully stacked, melt-in-your-mouth cakes filled and coated in an amazing, albeit non-traditional, icing you’ll love.
Typically, petit fours have a poured fondant or a white chocolate coating, but I found these to be either too sweet, too difficult to use, or simply not very tasty.
I instead dedicated quite a bit of time to developing my own solution and instead use what is essentially a melted buttercream frosting. It drapes the petit fours smoothly and evenly, dries firm, colors well, and, most importantly, tastes excellent! It took me many attempts to get it right, but I am so happy with the final result, and I know you will be too ❤
What You Need

I prefer to make two separate cakes not only because it produces perfectly level, thin cakes, because also because it gives us the options to make two flavors of petit fours! Today I’m making just one flavor.
Here’s an overview of what you need:
- Softened cream cheese. Adding this to our pound cake gives it a beautifully plush (but still sturdy!) and crumb. Please don’t use the tub-style cream cheese!
- Milk. I recommend whole milk, and it’s best if it’s room-temperature.
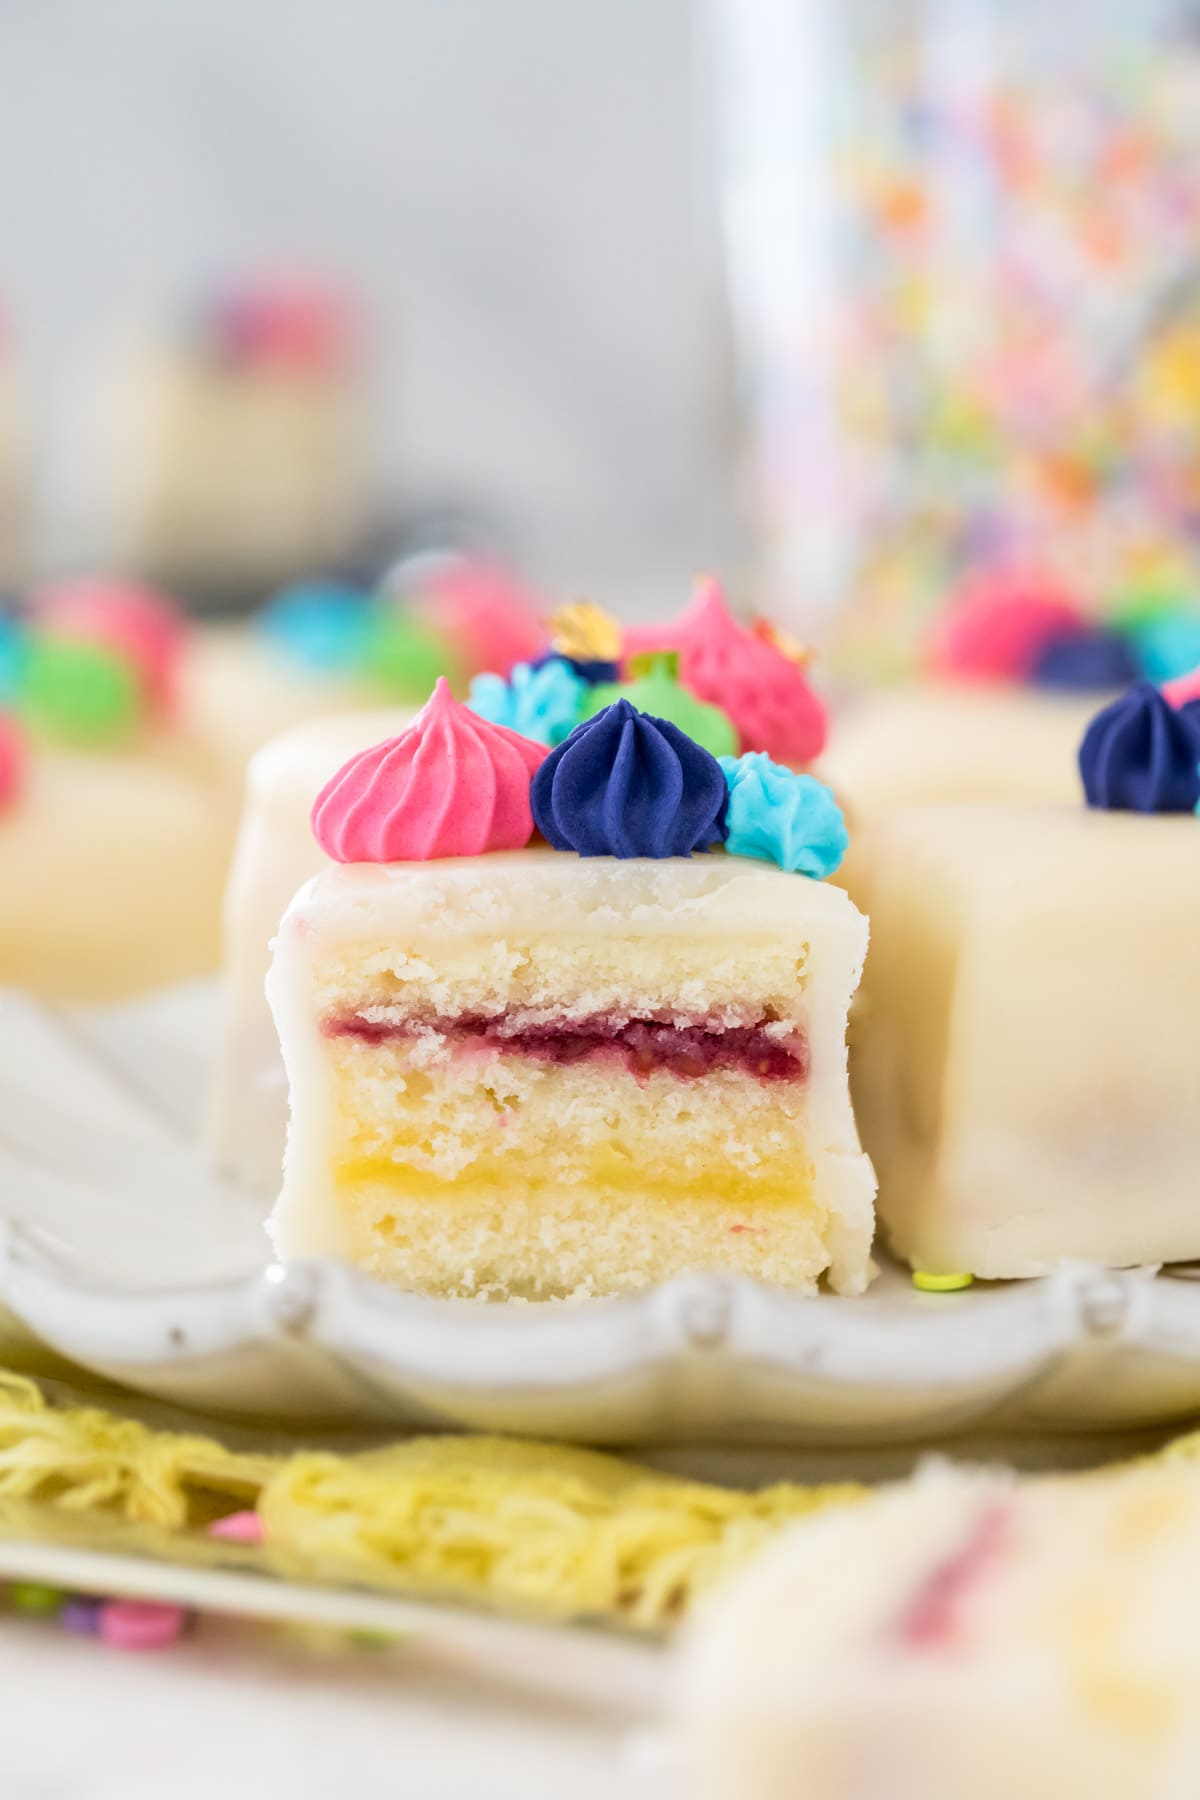
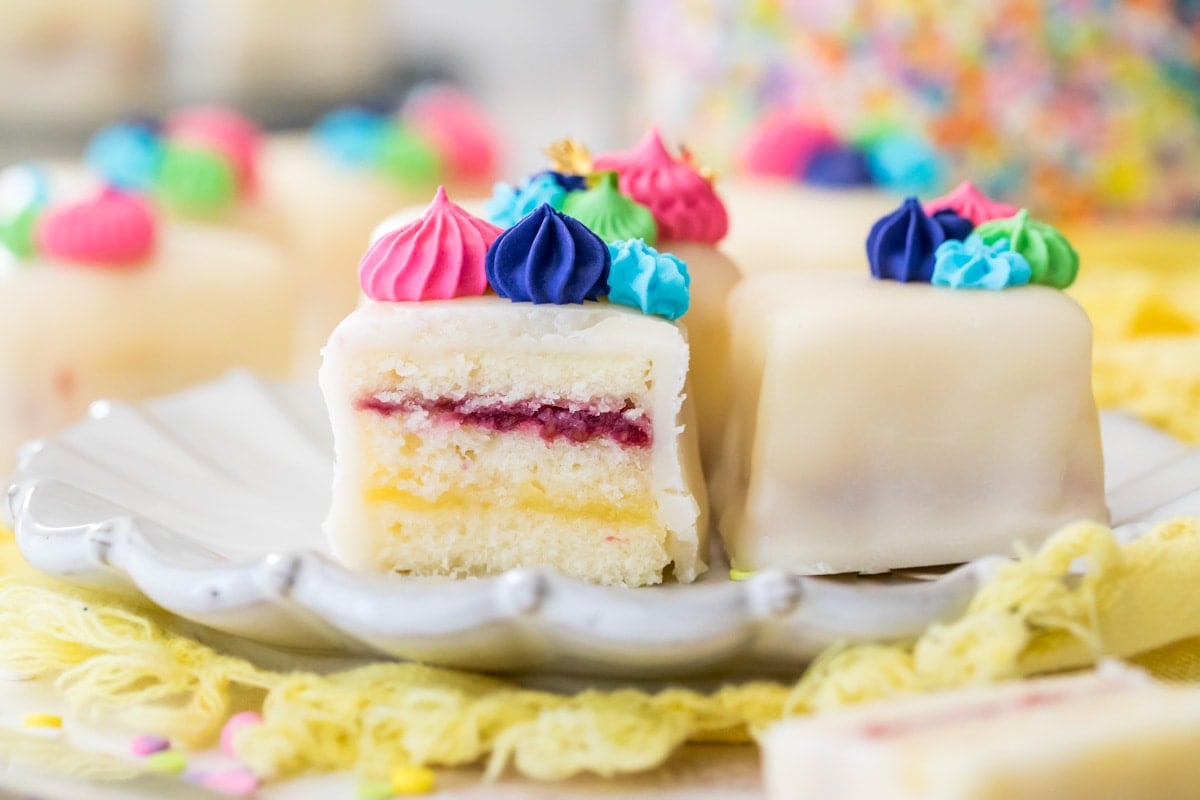
- Fillings. I used fresh lemon curd and homemade raspberry cake filling for fresh, summery petit fours; however, you can use just about any sturdy filling. You’ll need about two cups total (so if you’re going for two different flavors, one cup of each).
- Corn syrup. This is not the same as high fructose corn syrup. Adding this to our icing gives it a sleek, firm finish that you can easily pick up once cooled.
SAM’S TIP: The cakes will most likely still look very pale (see above) even once they’re finished baking. Don’t over-bake or the layers will be dry!
Remember, this is just an overview of the ingredients I used and why. For the full recipe please scroll down to the bottom of the post!
How to Make Petit Fours
- Bake the cakes as instructed, let them cool, and them cut into thirds.
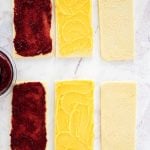
- Working with the first cake, spread two of the slices with a thin layer of filling (or fillings!).
- Stack the layers and top with the final plain cake layer.
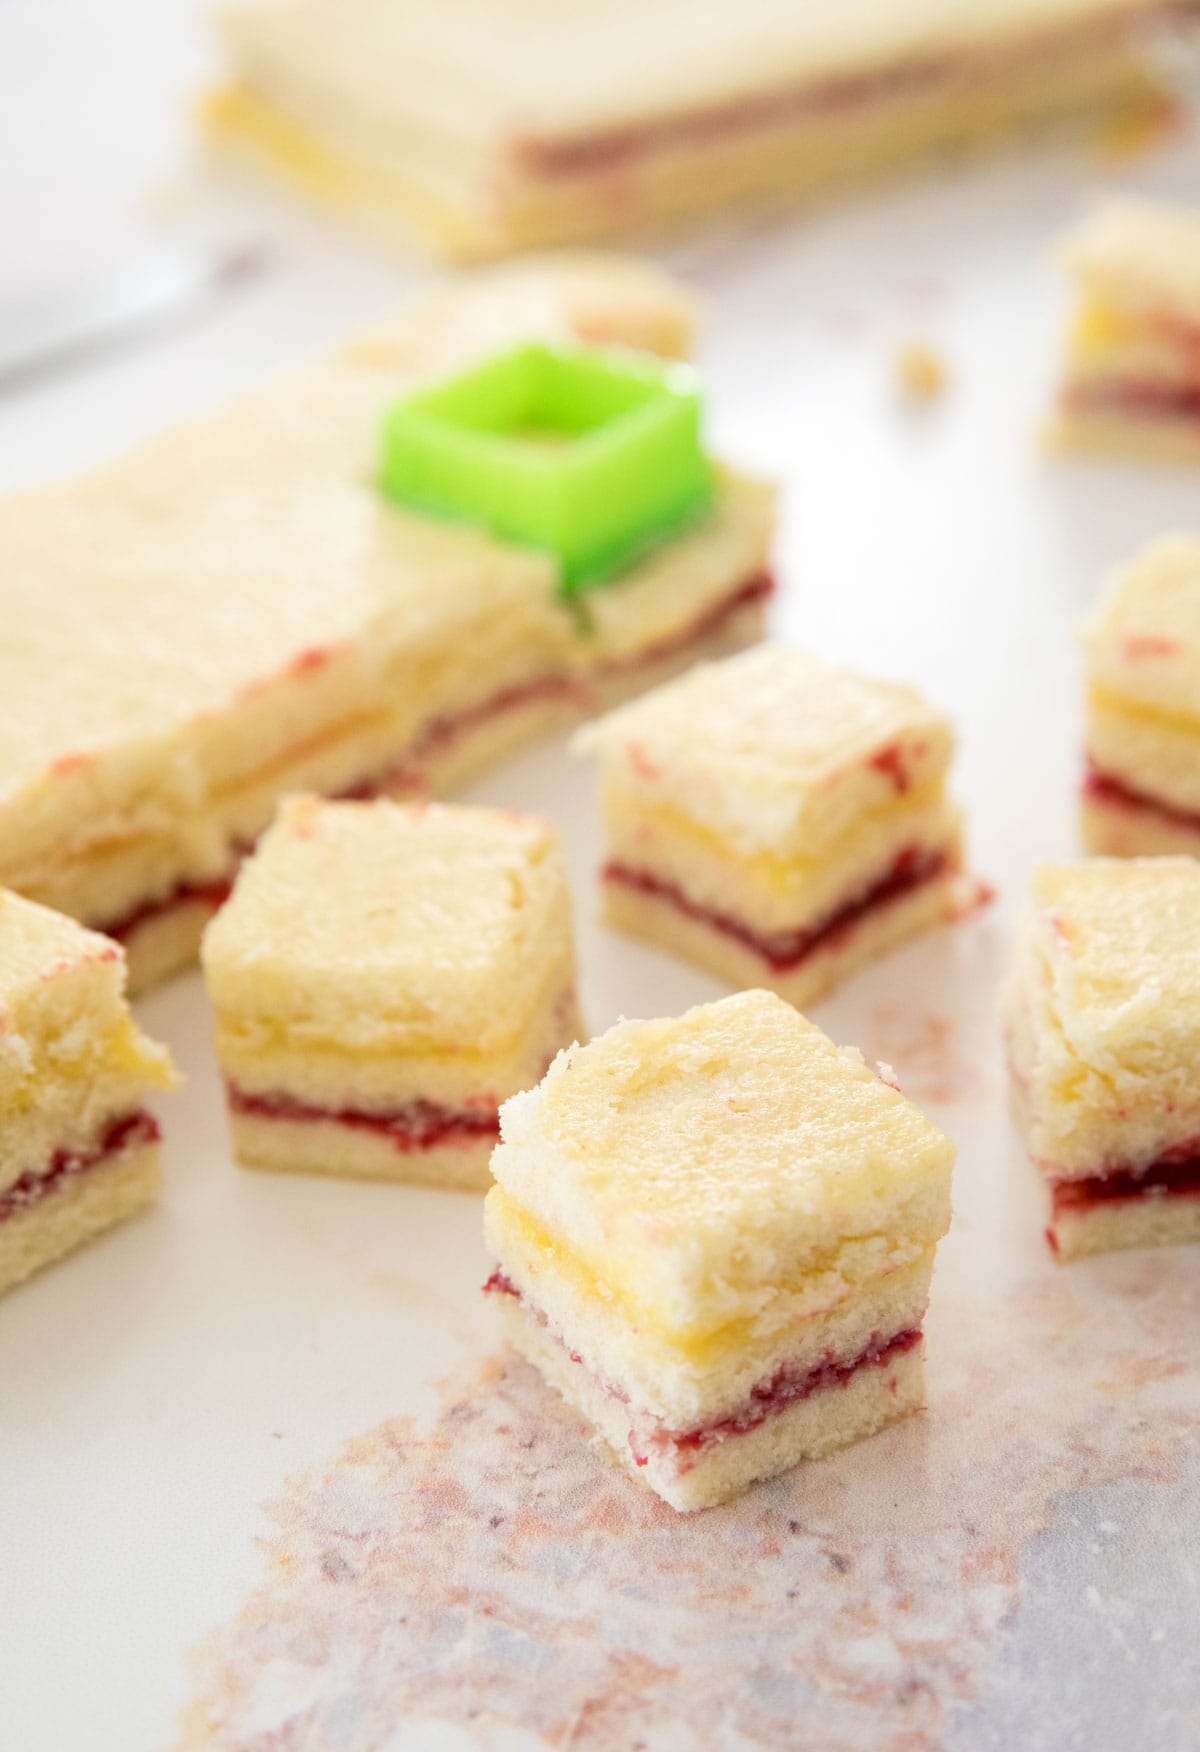
- Cut the cake into 1½” squares and place onto a wax paper-lined baking sheet
- Repeat with the other cake, then cover with plastic and freeze while you prepare the icing.
SAM’S TIP: Before cutting into the cakes, gently but firmly press your hands over the surface to squeeze out any extra filling so that your layers don’t slide! You can cut the petit fours into shapes with a large knife or with small cookie cutters. I used a 1 ½″ square cookie cutter for uniform cakes (see above).
- Combine the butter, heavy cream, and light corn syrup in a double boiler until melted.
- Stir in the vanilla, then gradually add the powdered sugar and stir until the frosting reaches the proper consistency.
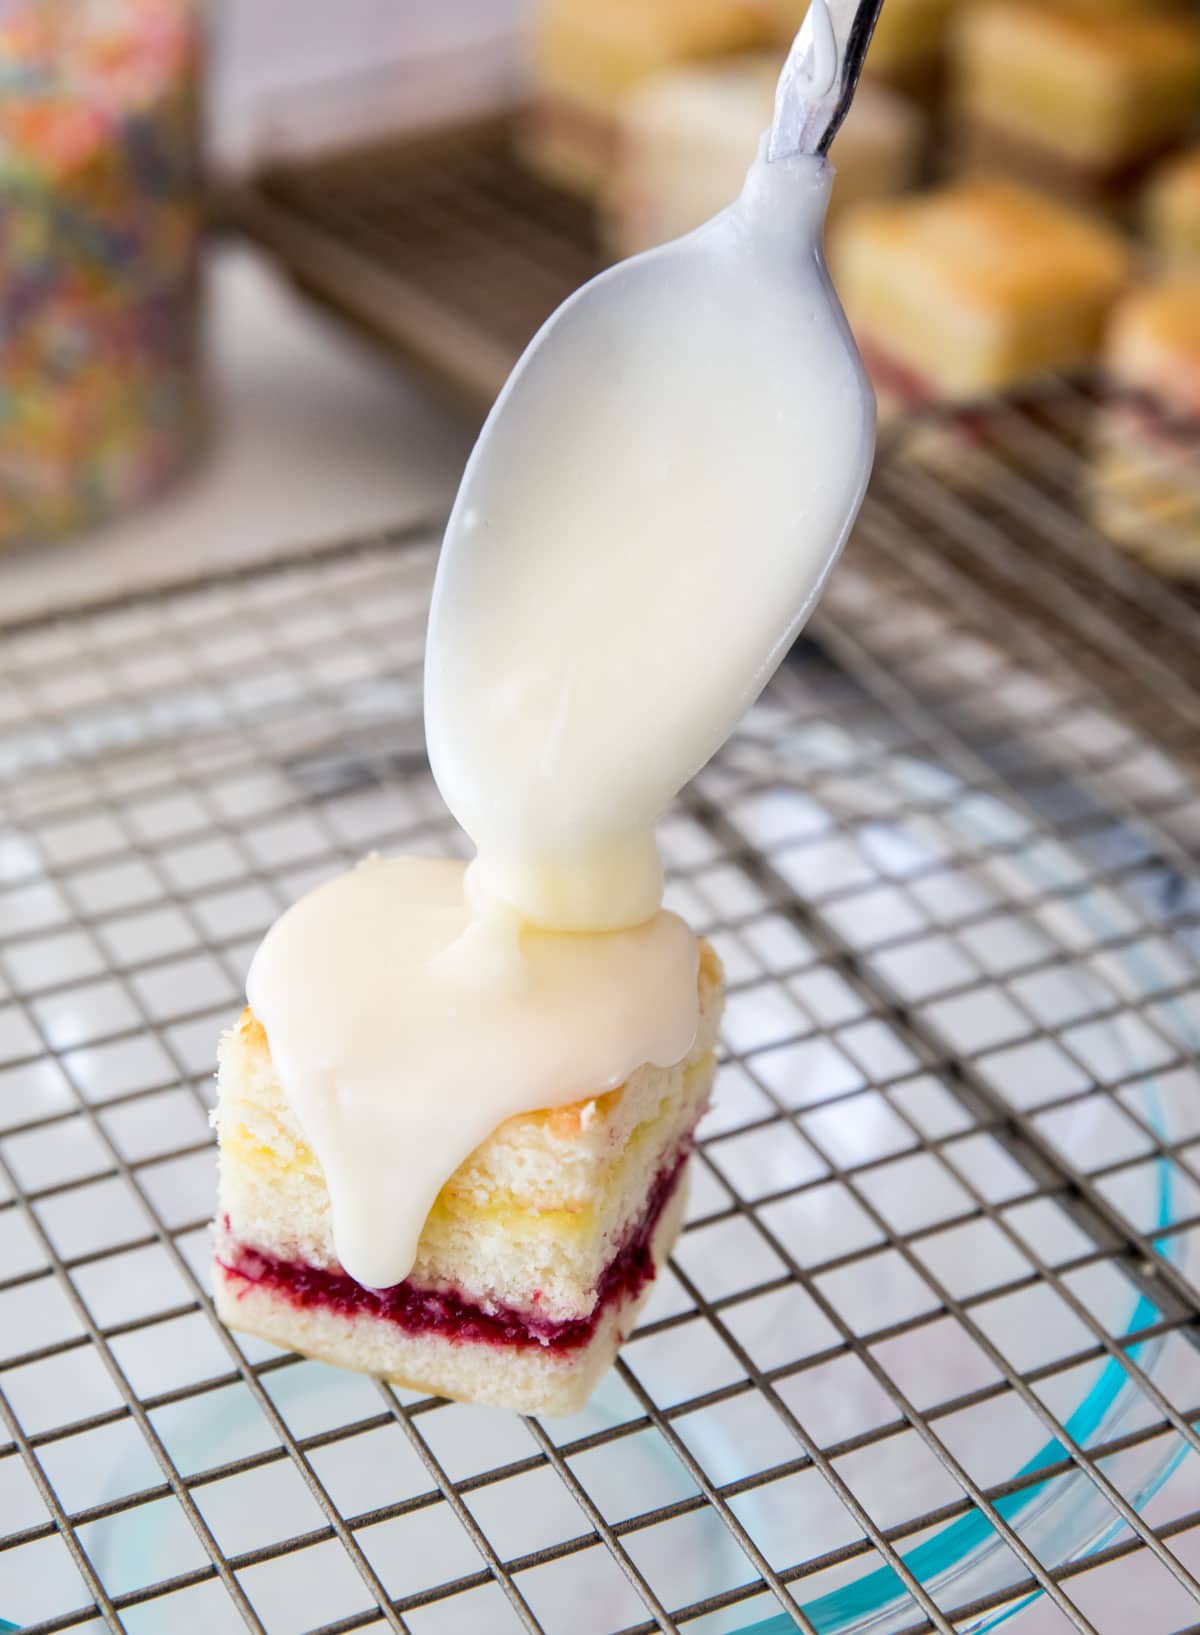
- Coat the frozen cakes with icing and let them firm up before decorating with additional icing or enjoying.
SAM’S TIP: You can make this icing in the microwave or on a double boiler. I highly recommend a double boiler for best results; it keeps the icing fluid and allows you to easily adjust the consistency as needed. If you use the microwave, you will frequently have to reheat your icing to keep the proper consistency.
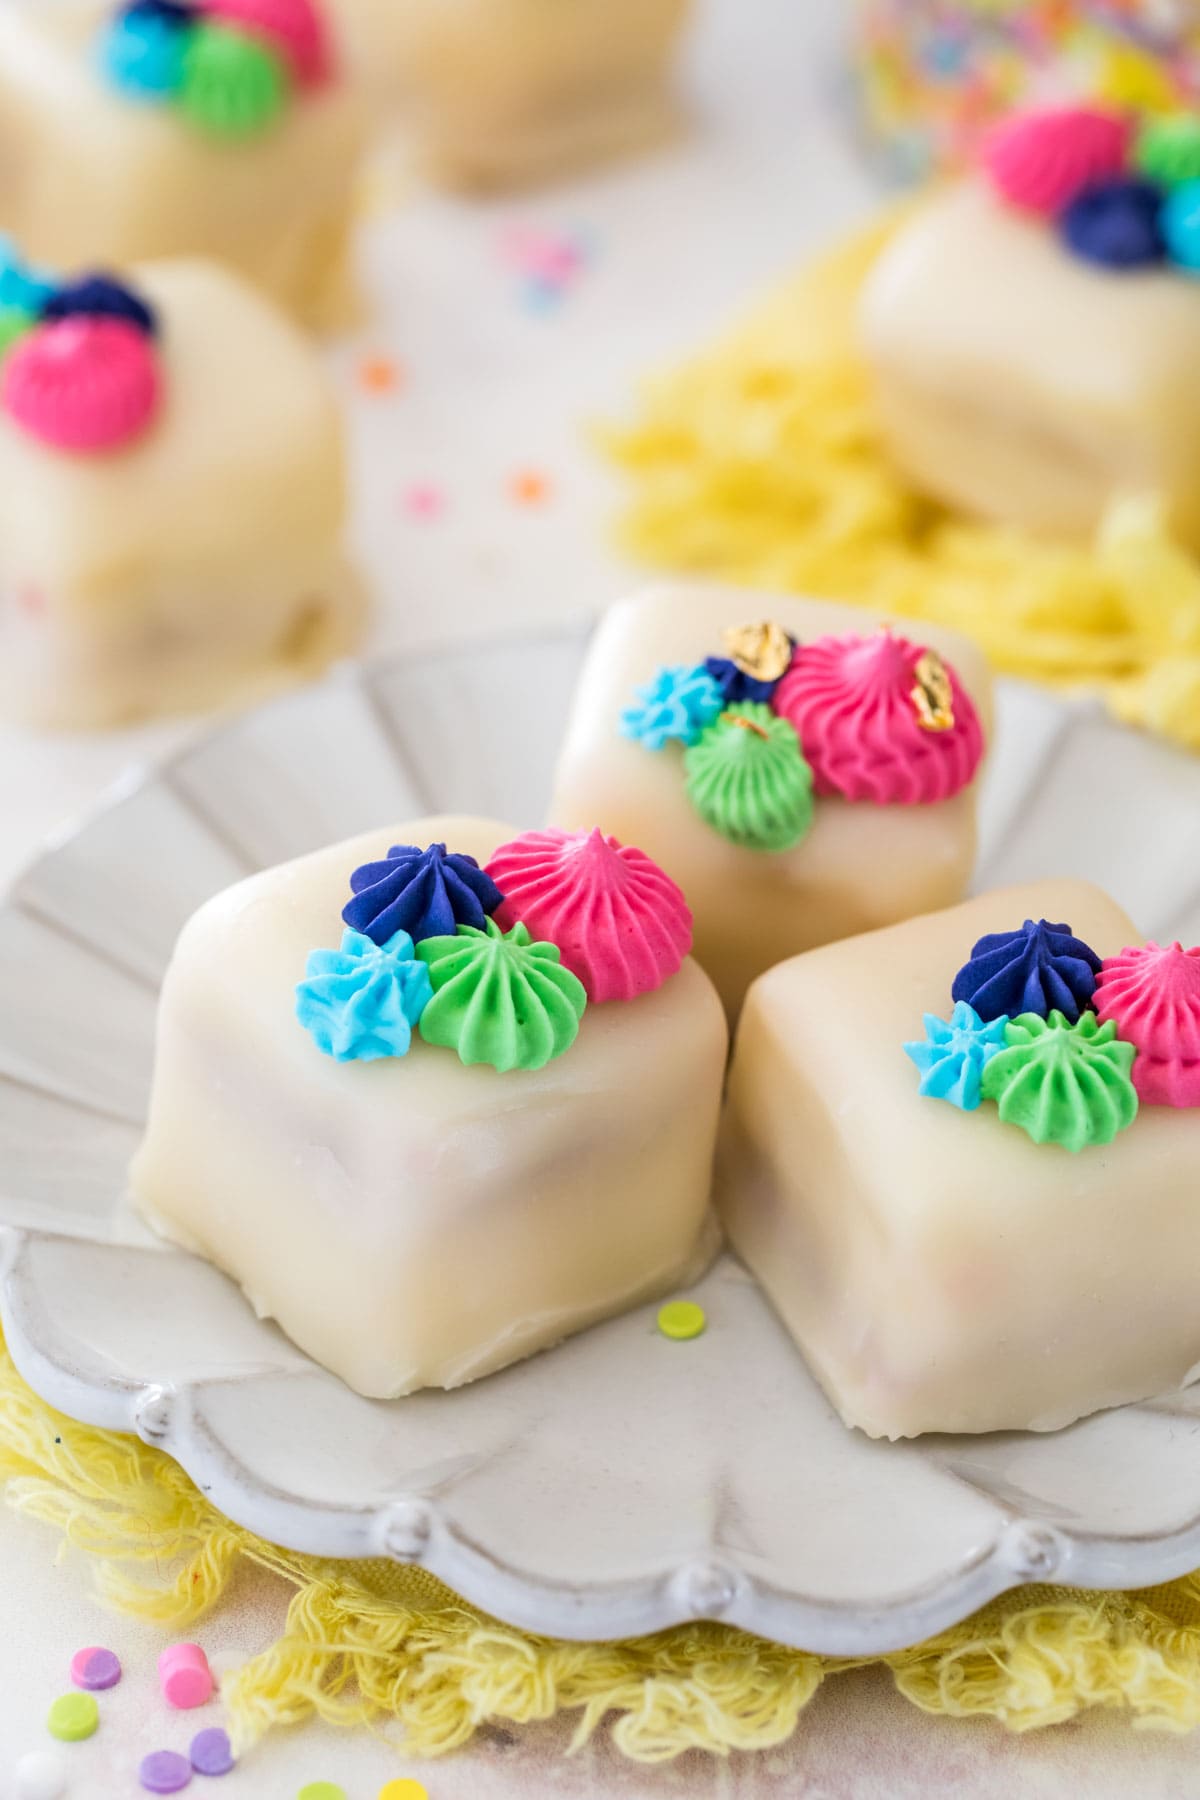
After the icing dries completely, you can decorate your petit fours using my royal icing recipe, as I did here. I modeled the decorations here after my funfetti cake and used several small open star tips to decorate. This is completely optional, but don’t they look pretty!?
Frequently Asked Questions
Petit fours should be stored in an airtight container. They will keep at room temperature for two days or refrigerated for up to a week. They may also be frozen for two to three months.
While I love the combination I’m using today, you can certainly get creative with your petit four fillings. Here are a few other great options:
Salted caramel sauce (cool before using!)
Chocolate ganache (cool to a thicker, spreadable consistency before using!)
Nutella
Peanut butter frosting
Cream cheese frosting
Yes. I recommend a gel food coloring; a little goes a long way, and it doesn’t flavor the icing like many liquid dyes do.
While my recipe is more simple than most, I still recommend you watch the video in the recipe card before beginning.
Enjoy!
Let’s bake together! I’ll be walking you through all the steps in my written recipe and video below! If you try this recipe, be sure to tag me on Instagram, and you can also find me on YouTube and Facebook

Petit Fours (easy step-by-step recipe!)
Ingredients
FILLINGS
- 1 batch lemon curd (click the link for the recipe) or 1 cup of your preferred filling
- 1 batch raspberry cake filling (click the link for the recipe) or 1 cup of your preferred filling
CAKE
- ⅔ cup (150 g) unsalted butter softened
- 4 oz (113 g) cream cheese softened
- 1 ½ cups (300 g) granulated sugar
- 4 large eggs room temperature preferred
- 2 teaspoons vanilla extract
- 2 cups (250 g) all purpose flour
- ½ teaspoon salt
- 1 teaspoon baking powder
- ¼ cup (60 ml) whole milk
PETIT FOUR ICING
- 15 Tablespoons (221 g) unsalted butter cut into pieces
- 1 ½ Tablespoons (22 ml) heavy cream
- 6 Tablespoons (88 ml) light corn syrup
- ⅛ heaping teaspoon salt
- 1 ½ teaspoons vanilla extract
- 4 ¾ cup (600 g) powdered sugar
- Gel food coloring optional, only if desired
Recommended Equipment
Instructions
- I strongly recommend you read through the post and watch the video before beginning. It will help you, especially when it comes to icing the petit fours as flawlessly as possible!
- If making fillings listed from scratch, prepare these in advance of beginning the recipe.1 batch lemon curd, 1 batch raspberry cake filling
CAKE
- Preheat oven to 350F (175C) and grease and flour or spray with baking spray two 10×15” jelly roll pans (if you only have one, you can bake one cake at a time, just let the pan cool completely before washing it and re-using).
- Combine butter, cream cheese, and sugar in a large bowl and beat with an electric mixer until creamy, well-combined and lightened in color.⅔ cup (150 g) unsalted butter, 4 oz (113 g) cream cheese, 1 ½ cups (300 g) granulated sugar
- Add eggs, one at a time, stirring wella after each addition (about 10 seconds on medium speed after each egg).4 large eggs
- Stir in vanilla extract. Mixture should be very smooth, light, and creamy when finished mixing. Be sure to scrape the sides and bottom of the bowl periodically to make sure all ingredients are well-combined.2 teaspoons vanilla extract
- In a separate bowl, whisk together flour, baking powder, and salt.2 cups (250 g) all purpose flour, ½ teaspoon salt, 1 teaspoon baking powder
- With mixer on low-speed, alternate adding flour and milk to the butter mixture until ingredients are completely combined (scrape sides and bottom of the bowl as needed).¼ cup (60 ml) whole milk
- Divide batter evenly into prepared jelly roll pans and spread so the layers are even and smooth. Transfer to 350F (175C) oven to bake for 12-13 minutes (if baking one layer at a time) or 15 minutes (if baking both at the same time) or until baked through and cake springs back when lightly touched. Cake may still appear very pale even when baked completely through, don’t over-bake or it will be dry.
- Allow cakes to cool completely then, working with one cake at a time, cut first cake into three even pieces, each just under 5” wide.
- Transfer each piece to a clean surface. Evenly spread lemon curd or filling of choice on one third and raspberry cake filling or filling of choice on another. Leave the last third plain, this will be your top layer,

- Stack the cake thirds with the plain layer on top and gently press down all over wit your palms to gently squeeze out any excess filling. Using a 1 ½” round or square cookie cutter (or use a sharp knife to cut into even 1 ½” squares) firmly press down to cut out square and transfer to a wax paper lined baking sheet. Repeat until you have cut out as many cakes as possible. Set aside and repeat with remaining cake.
- Cover petit four cakes with plastic wrap and place in the freezer while you prepare icing.
ICING
- Heat about 2-3” of water over medium-low heat in a medium-sized saucepan and bring to a simmer. In a medium or large heat-proof bowl that fits snuggly over your saucepan without touching the water, combine butter, heavy cream and light corn syrup. Stir frequently over simmering water until melted.15 Tablespoons (221 g) unsalted butter, 1 ½ Tablespoons (22 ml) heavy cream, 6 Tablespoons (88 ml) light corn syrup
- Add salt and vanilla extract, then gradually add sugar until combined and mixture is smooth. Test the consistency of the icing by lifting your spoon out of it. If it drizzles smoothly back into the bowl and holds its shape for a second before dissolving into the bowl of icing, it’s perfect. If it’s too stiff, add a splash more cream as needed. Stir in any food coloring here, if desired.1 ½ teaspoons vanilla extract, 4 ¾ cup (600 g) powdered sugar, Gel food coloring, ⅛ heaping teaspoon salt
- Remove petit fours from the freezer and place on on a large fork over the bowl of icing (so that any drips fall back in the bowl to be re-used). Using a spoon, spoon icing over the petit four until it is completely covered. Use your first petit four as a gauge for testing how smoothly the icing covers and adjust as needed. Return cakes to the baking sheet, and repeat with remaining cakes until all are covered.
- Allow to cool completely for icing to harden before enjoying (this can be done at room temperature or in the refrigerator). If desired, after cooling completely decorate with royal icing.
Notes
Video Note
After making the recipe as shown in the video a few times I decided to scale up the frosting by 50%. The recipe written here is the same as shown, just scaled up to give you more to play with.Storing
Petit Fours will keep stored in an airtight container at room temperature for 2 days, refrigerated for up to a week, or frozen for 2-3 months.Nutrition
Nutritional information is based on third-party calculations and should be considered an estimate only. Actual nutritional content will vary based upon brands used, measuring methods, cooking method, portion sizes, and more.


Debbie Threatt
Hey there from MS again. I’m making 6 dozen tomorrow and I just saw where someone asked you about the recipe vs the video as far as the number of tbs of butter. So 15 tbs is correct? The second time I made them it was much more translucent. I’m going to try this recipe once more tomorrow and use the 6 tbs addl butter. I may even put a small amount of frosting on th strawberry ones before putting in the freezer before glazing.
Sam
Hi Debbie! Either one will work perfectly fine and they are the same (ratio-wise), but I prefer the written recipe as it yields more icing. The written recipe is simply scaled up 50% to give you more to play with.
Debbie Threatt
Wow thanks so much that makes perfect sense. How many will the written batch usually cover? I’m excited about the frosting recipe to use it today because it really is so much better than anything else I’ve found.
Sam
It covers all of the petit fours (32) that this recipe makes. 🙂
Anne
Can i halve this recipe and just do one pan? I know some recipes don’t work as well when halved and wanted to check before i made them. I was only going to make a few. Thanks!
Sam
Hi Anne! You should be able to cut this recipe in half without issue. 🙂
Karen Sheehan
I will be making these for a bridal shower. I made my trial run tonight. The cake is delicious. I used a rhubarb curd and lemon curd for the fillings. The fondant frosting is very good. However, it was a little thicker than I would prefer. I added a little more cream, but did not want to compromise the flavor, any suggestions. I will be watching your video again before I make the next batch.
Sam
Hi Karen! Make sure to keep it warm and a splash more cream will help thin it out. 🙂
ZSH
Amazing! Great step-by-step recipe and delicious result. I am making another batch today!
Sam
I’m so glad you enjoyed them so much! 🙂
Laura
I would love to watch the video but I can’t find the link. When I click “Jump Straight to Video” it takes me to the written recipe. I’m sure this is user error 🙂 – can anyone point me to the video?
Sam
Hi Laura! If you have an ad blocker enabled it will prevent the video from playing. It should show up right above the ingredients. If you still can’t find it, I do post all of my videos on youtube as well. 🙂
Debbie Threatt
I just used the icing recipe and the first time I made them, they were perfect but a week later, they would not drizzle correctly and seemed to take forever to set up. I live in MS and wondered if higher humidity might be the culprit. I’ve only made 2 dozen both times but need to make 6 dozen the end of this month. Any pointers or suggestions?
Sam
Hi Debbie! Humidity could be the issue for sure and could definitely affect how they set up. I would recommend a little tinkering to best suit your precise kitchen atmosphere. Don’t hesitate to add a bit more sugar or a bit more cream as needed to get the proper consistency. To help yours set up better, you may need to keep it over a double boiler and make the mixture slightly warmer but add more sugar, the sugar adds stability and helps it set up properly. If you haven’t already taken a peek at the video I would recommend checking out the last bit where I make that icing, it might be helpful. I’m happy to help troubleshoot further if needed, though!
Jeanette T
Hey Sam: I watched your video twice. The first time I didn’t notice anything except your technique. The second time I watched it was right before I was going to assemble the icing. At that time I realized that in your video you give different measurements than what your post shows. For example your post shows 15T of unsalted butter but in your video you say 9T of butter. Why different measurements? I used the measurements in the video and that coated 15 of my petit fours Which one is the most updated? Thanks
Sam
Hi Jeanette! Sorry for any confusion, but the written recipe is correct here. 🙂
mona henson
Can I just make two 9 inch cakes out of this. Trying to make one large cake in a shape with lemon curd filling.
Sam
Hi Mona! I would check out my lemon cake recipe instead of trying to alter this recipe. 🙂
Lisa
I stacked this recipe on top of a very thin layer of cream cheese iced lemon bar, cut them up and coated the whole thing. This was one of the best things I’ve ever made! This pourable fondant is insanely delicious and I really appreciate the technique utilizing the thin cakes and not having to split them. Thank you so much for this amazing recipe!
Sam
I am so glad you enjoyed it so much, Lisa! 🙂
Jackie
Thanks for making me feel like I can tackle any recipe! Love the blog and the YouTube channel 🙂
Sam
You are welcome, Jackie! Thank you for following along! 🙂
Annette
Do you have a fondant recipe? A simple one. Thanks
Sam
Hi Annette! Unfortunately I do not have a fondant recipe. 🙁
Melanie
The cake is great. The frosting is really not. I used Kerrygold butter so it was yellow. I don’t know how you could actually get it white. I wanted light blue and ended up with green. It doesn’t really flow all that well (and I kept over a double boiler). When you drizzle, you need a lot and it doesn’t really harden like fondant. Good idea, but I think I’ll just stick to peeling off fondant. 🙂
Julie Popp
What would I need to do to make the cake batter chocolate? I’d like to have half the batter be vanilla (like original recipe) and the other pan be chocolate. Would I have to mix 2 separate batters from the start; or after I put half in a pan, could I turn the other half into chocolate?
Sam
Hi Julie! You would need to make 2 separate batters. To make it chocolate you would have to add some cocoa powder and reduce some flour. Without having tried it I wouldn’t be able to tell you exactly how to do it though. I hope you love it. 🙂
Karla
I have not made yet but planning to try. Have you ever added almond paste to this recipe?
Sam
Hi Karla! I haven’t tried it, but I think it could work. 🙂
Zach
Sam, these taste fantastic, I had a great time making them, and learned to stick closer to the directions! haha. Mine tasted good but didn’t turn out right because I took shortcuts, won’t do that again! Love the blog, and use a few of your recipes on a regular basis!
Chelsea
These were SO FUN to make! I’ve tried to make these before with a different recipe and limited success, but your suggestion to use the jelly roll pan and the pourable buttercream made these so easy! They are adorable and delicious, my nieces are going to love them!
Sam
I’m so glad you enjoyed it so much, Chelsea! 🙂