You can make bakery-style artisan bread at home! My incredibly easy recipe can rise overnight or the same day. Naturally egg and dairy free! Recipe includes a how-to video.
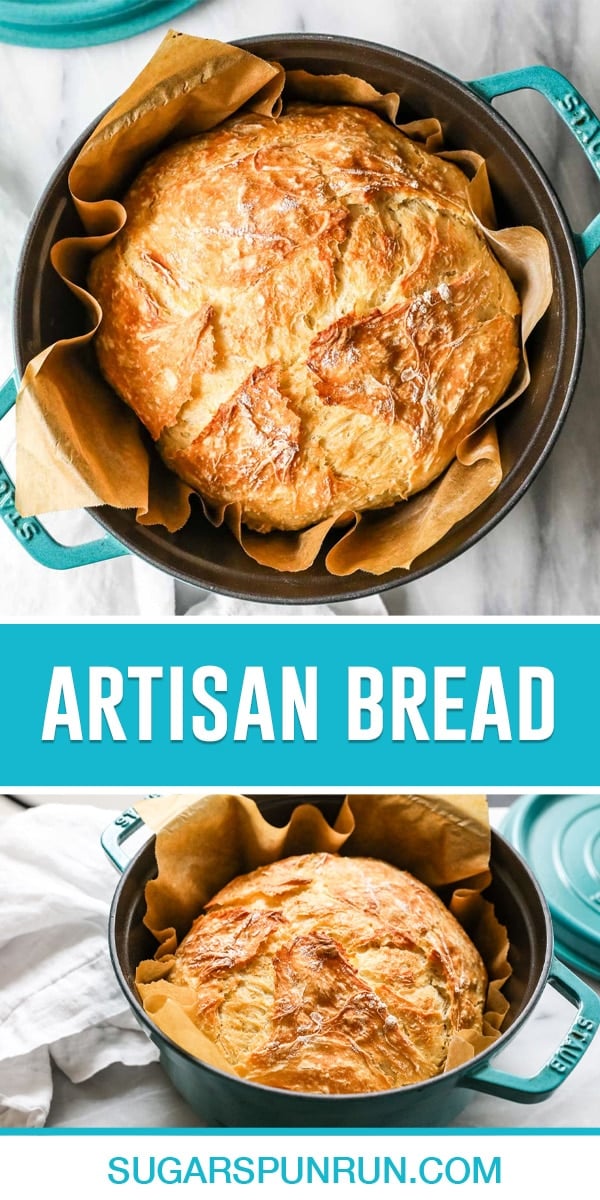
My Favorite Artisan Bread
Today I’m sharing an amazingly simple and EASY recipe for artisan bread. It has the same great flavor and texture we all love about this type of bread, but is incredibly simple to make. I’m talking mere minutes of hands-on time!
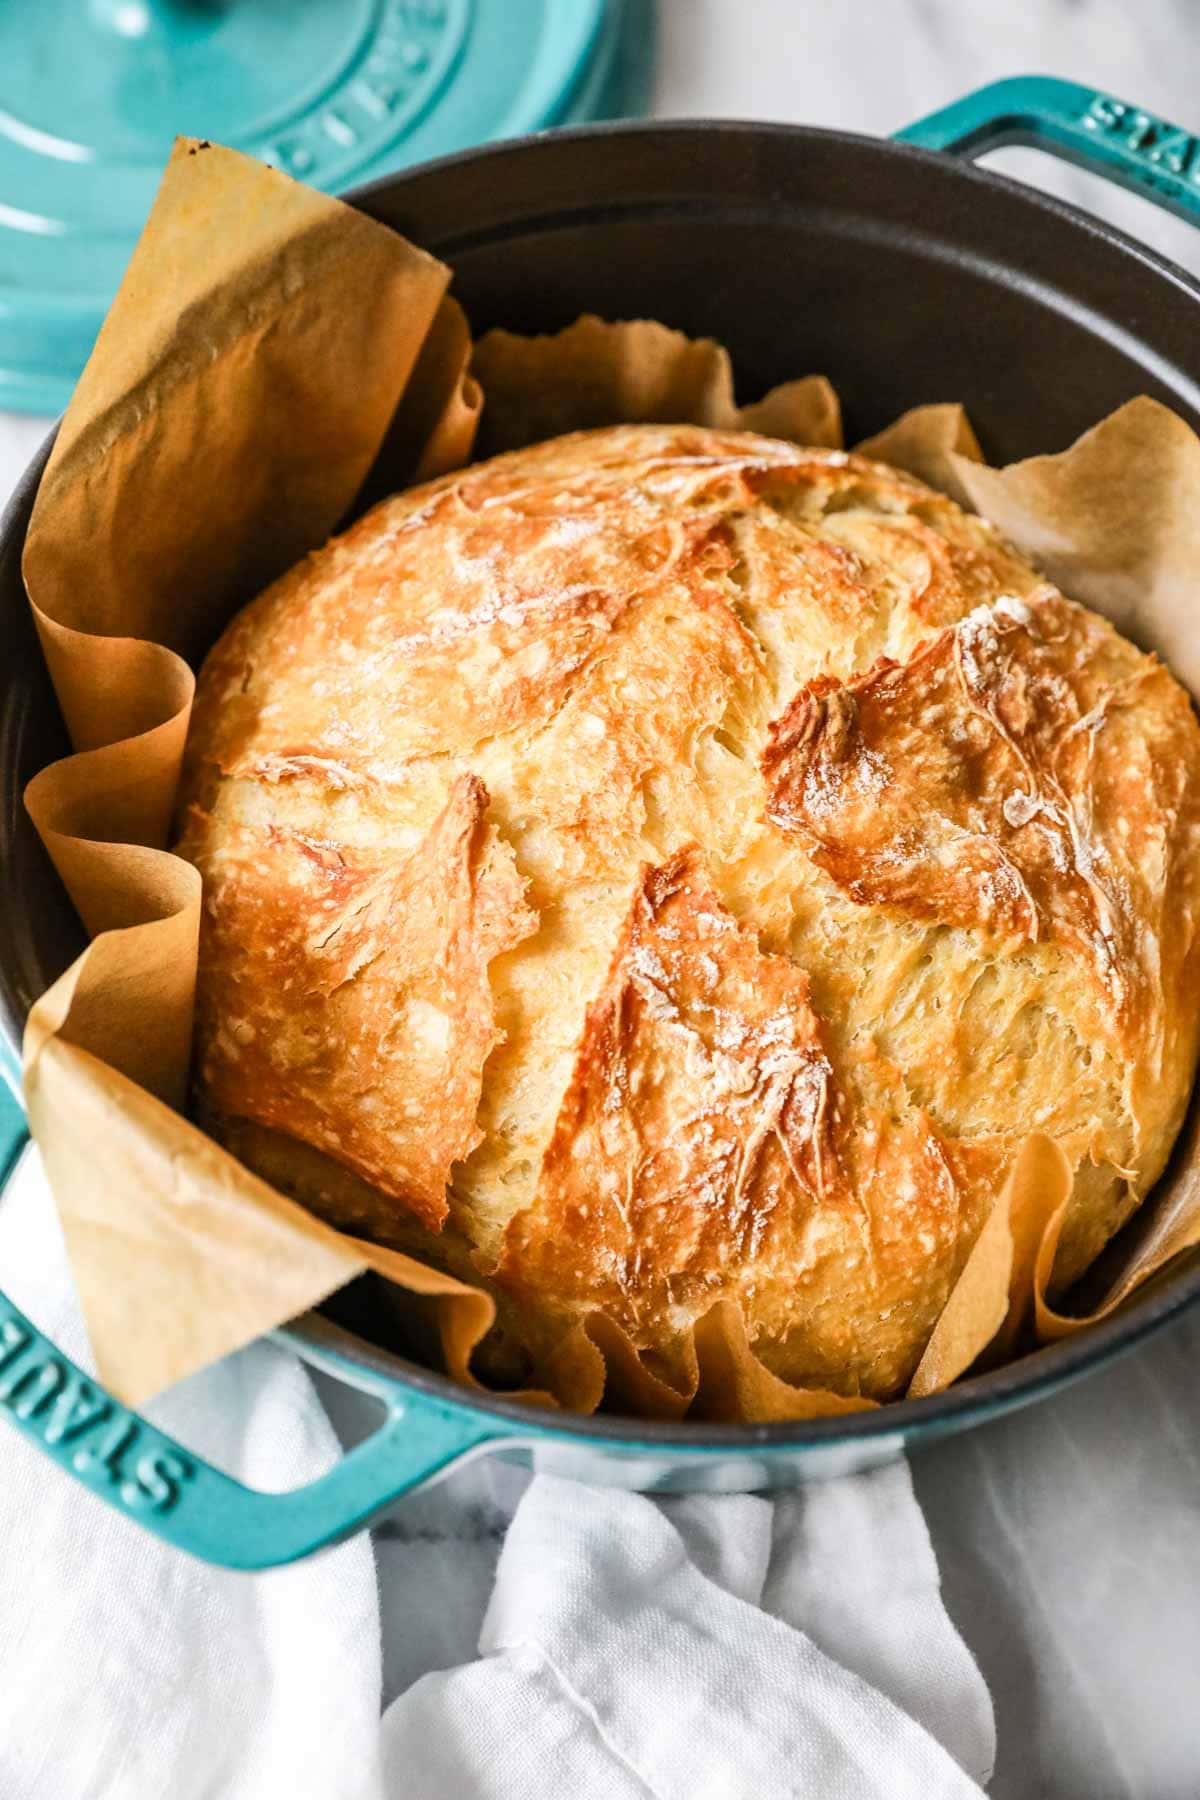
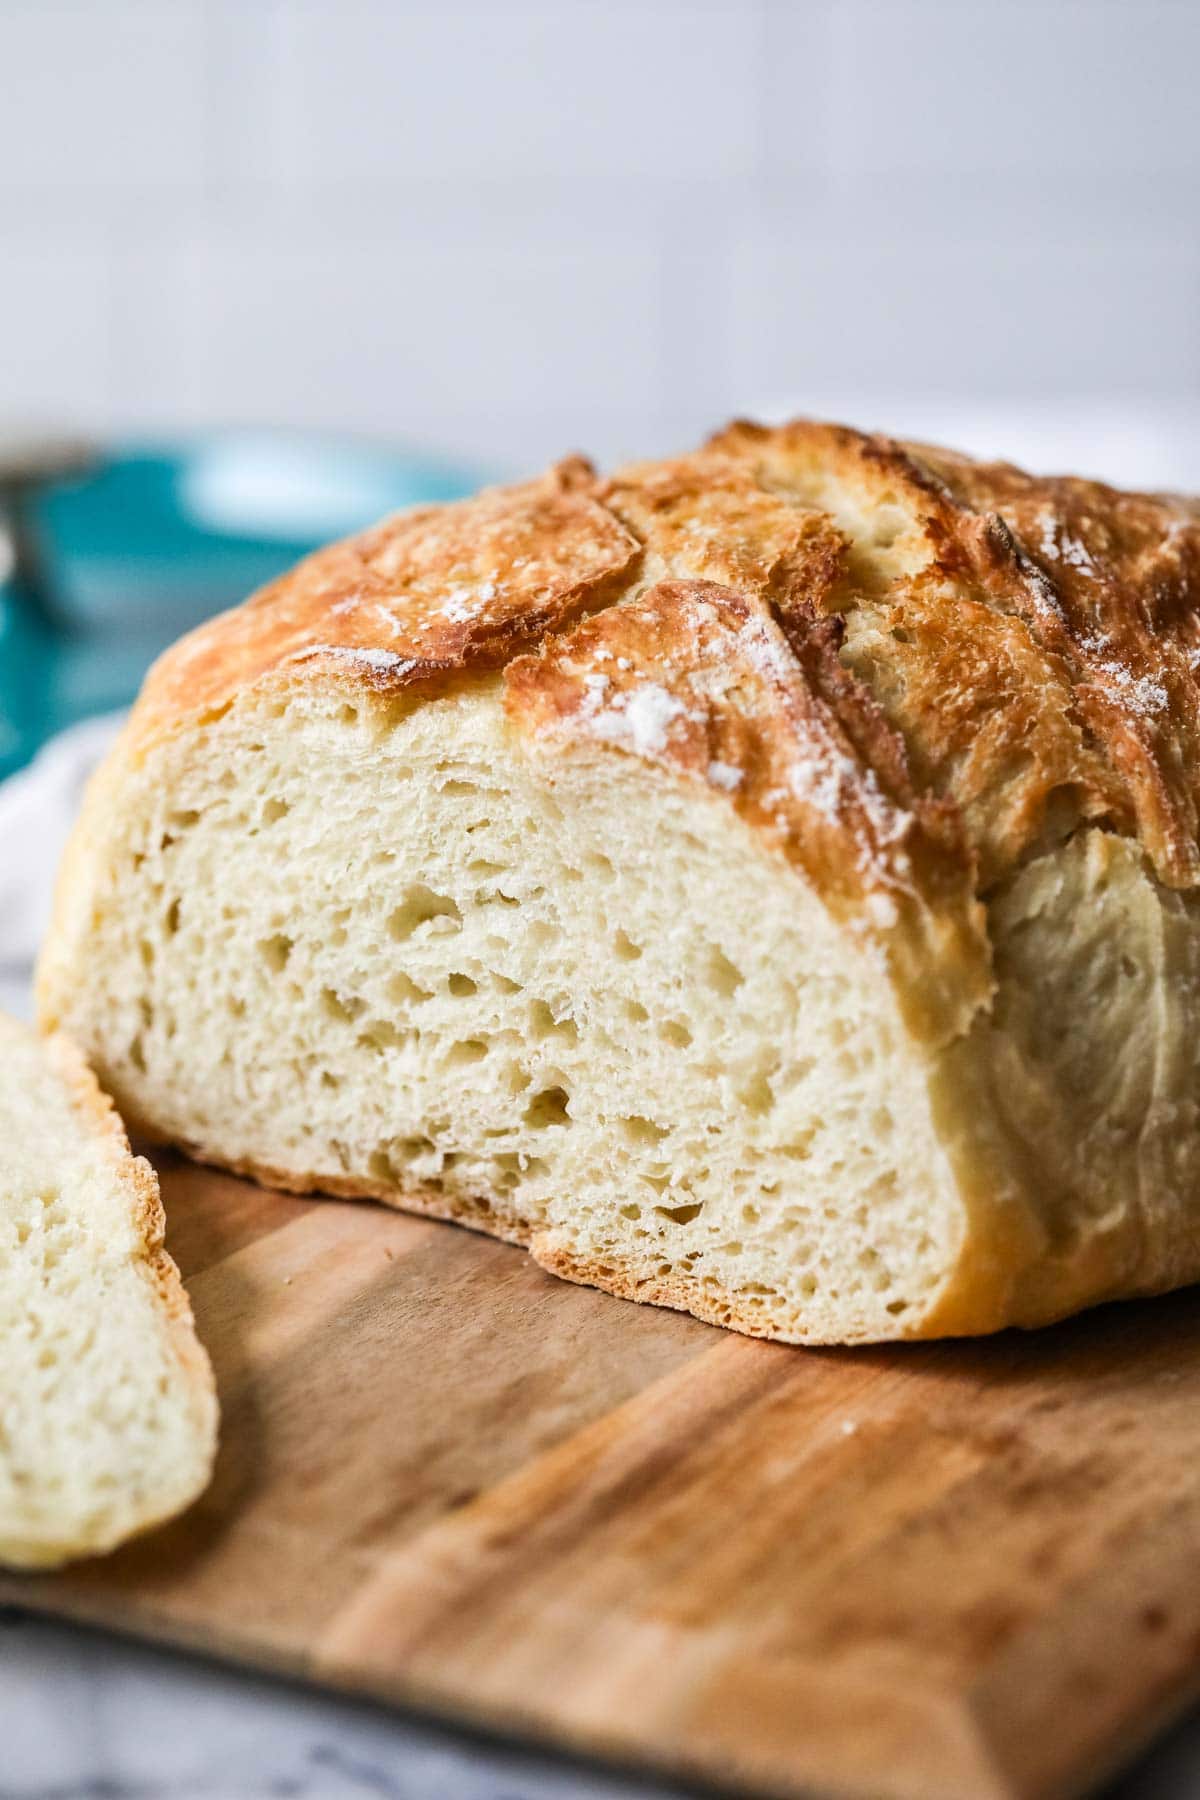
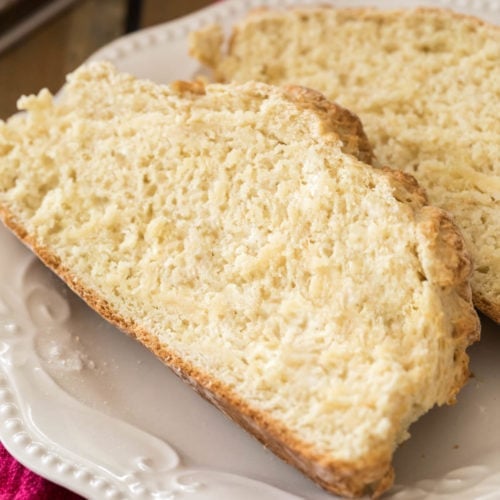
Not to be confused with your average sandwich bread, artisan bread is the rustic and hearty type best saved for dipping in soups (though it tastes great on its own or slathered with honey butter). It has a thick, chewy crust and a soft interior. The crumb is slightly moist and chewy, and it often has large air pockets, especially if you let it ferment overnight in the fridge.
Why You’ll Love This Recipe
- Choice of two preparation methods; either let the dough rise at room temperature for a few hours, or let it rise overnight in the fridge (and you can do this right after preparing–no need to let it rise on the counter first). Some people say the bread tastes better after a night in the fridge, and while I find this to be true for my sourdough bread, I personally don’t feel like it makes a huge difference.
- Pairs well with so many dishes, from beef stew and shepherd’s pie to garlic butter shrimp and broccoli cheddar soup.
- Naturally egg-free and dairy-free, and you can even make it sugar-free if you choose to omit the sugar.
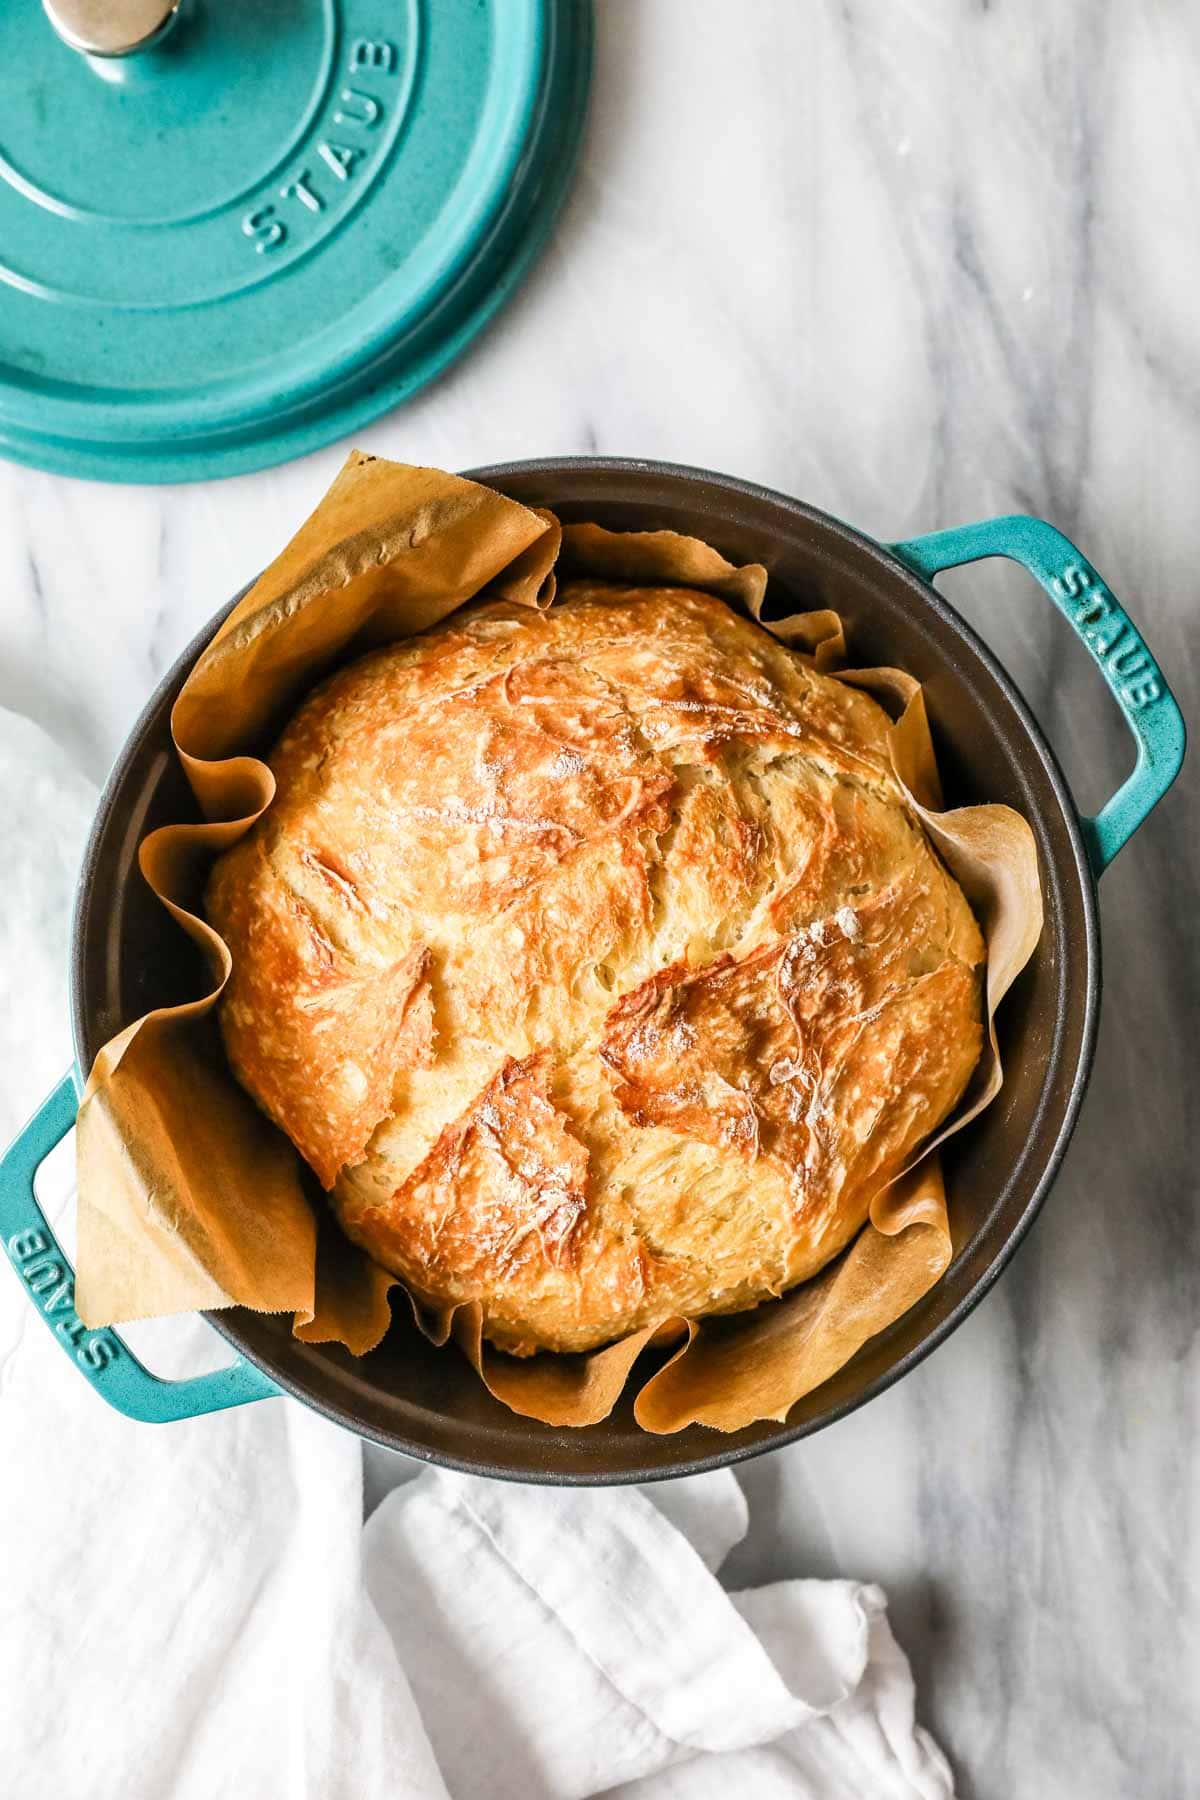
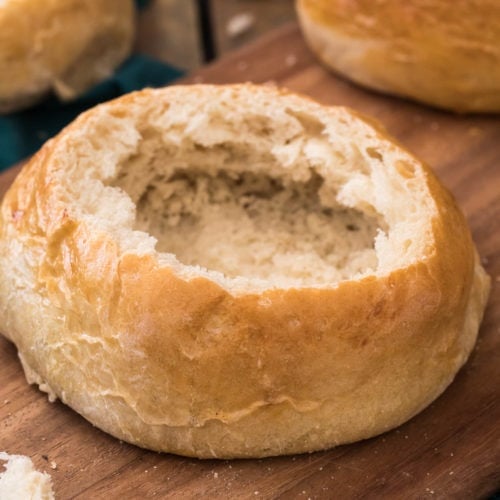
- Bake in a variety of vessels! A Dutch oven is best for baking artisan bread, but I know not everyone has one. To make this recipe accessible to everyone, I included options for baking in different pots/pans in the recipe notes.
And don’t forget–this recipe is EASY! While there’s some substantial time required for the bread to rise, that’s all hands-off and there’s less than a half hour of actual hands-on time required.
What You Need
With so few ingredients (only five!), it’s very important that each one you add be high quality. Here’s what you need to make my homemade artisan bread!
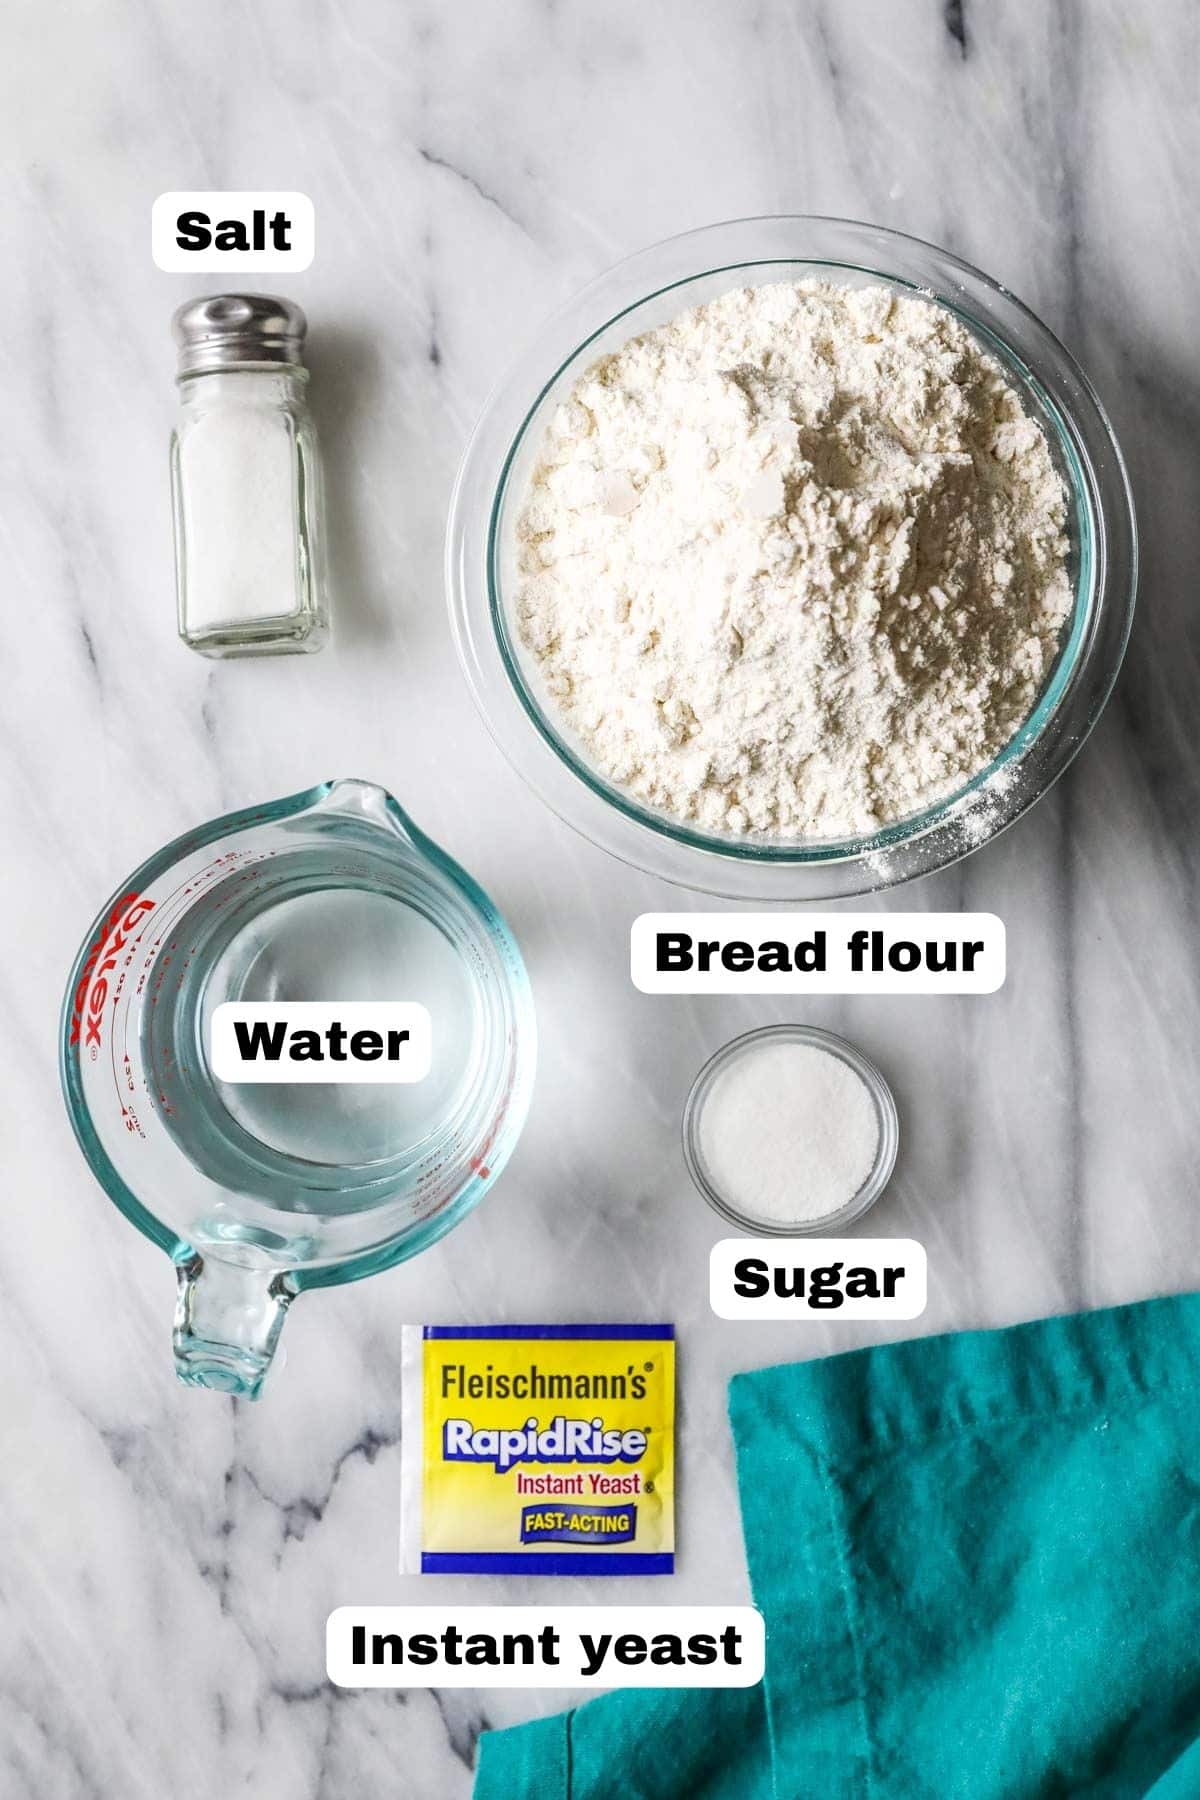
- Bread flour. Using a bread flour will yield a nicer final result, since bread flour contains more protein than regular all-purpose flour. You will need 3 ½ cups for the bread itself, plus more for dusting your work surface. In a pinch, you could substitute an equal amount of all-purpose flour.
- Yeast. Use instant or rapid rise yeast and make sure it’s fresh and not expired before you get started.
- Warm water. Make sure your water is 115F; if it’s too hot, it could kill your yeast, and if it’s too cold, your yeast might not activate.
- Sugar. This is optional and your bread will be fine without it, but I like to add the sugar because it helps the yeast and also adds a slight subtle depth of flavor (but not sweetness) to the bread.
- Salt. For flavor, of course! Regular table salt works just fine here.
SAM’S TIP: It’s very normal if your dough is sticky, as this is a high hydration dough. Don’t be afraid to be generous with the flour on your work surface and on your hands to make the dough easier to handle.
This is just an overview of the ingredients I used and why. For the full recipe please scroll down to the bottom of the post!
How to Make Artisan Bread
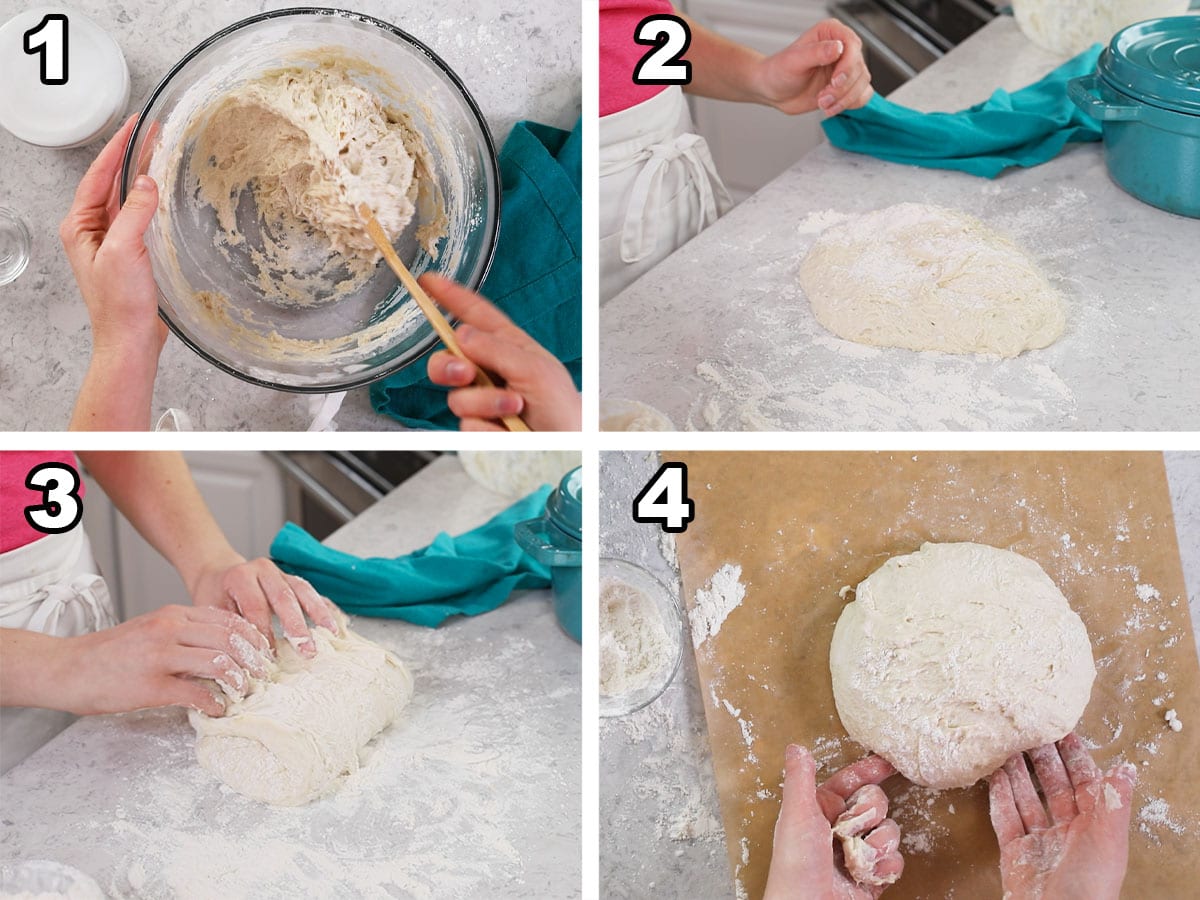
- Whisk the flour, yeast, sugar, and salt together, then stir in the warm water. Mix until everything is combined, then cover with plastic and let rise until doubled in size (or place in the fridge overnight).
- Form the dough into a ball on a generously floured surface. Add as much flour as you need here to make the dough easy to manage–it will be sticky!.
- Stretch and fold: Grab the top of the dough and fold it over the bottom, then turn the dough 90 degrees and repeat. Do this a total of four times. I demonstrate this in the video below if you need a visual!
- Form the dough onto a ball (you want it nice and round, the taller it is here the taller your loaf will be), then place in the center of a large piece of parchment paper. We will use this as a sling to transfer our dough to our pan. Cover the dough with plastic wrap and let sit while your oven preheats.
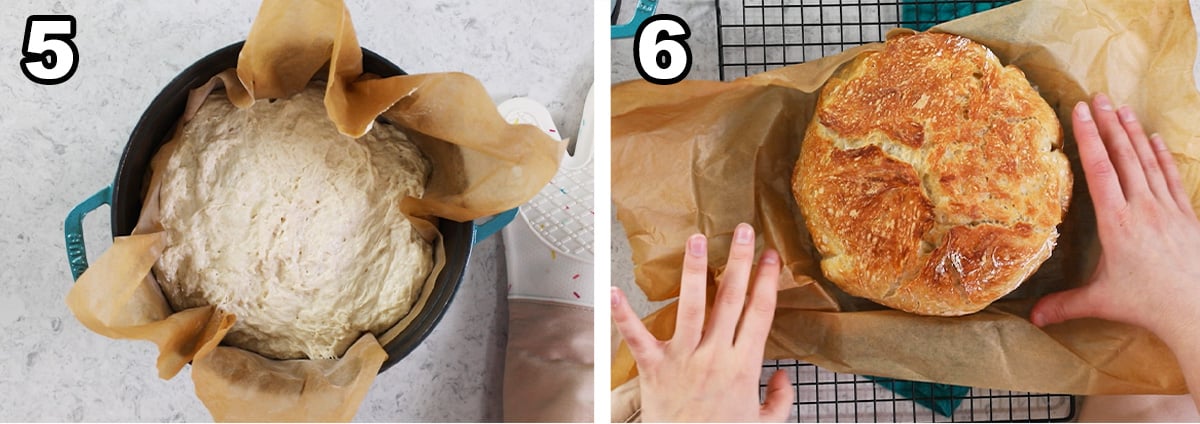
- Lower your bread into your pan using the parchment sling. Bake for 30 minutes covered, then remove the cover and bake for an additional 10 minutes.
- Let the bread cool in its pan for 10 minutes, then carefully remove to a cooling rack to cool completely.
SAM’S TIP: If you are using one, place your dutch oven in your oven while it preheats. This will create an ideal baking environment for your bread. Note that you need to be careful handling the pot and lid after it comes out of the oven–it will be very hot!
Frequently Asked Questions
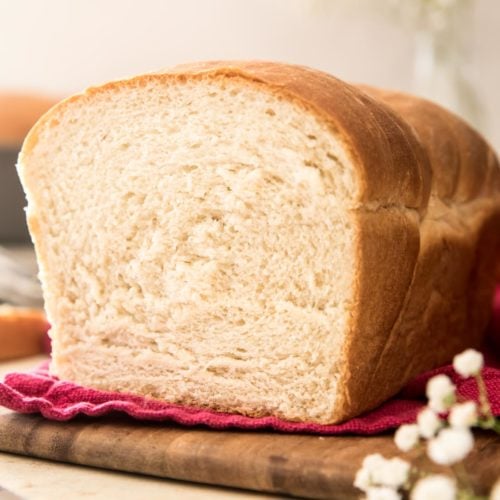
Yes! While a dutch oven is ideal, you can bake artisan bread in a loaf pan if that’s what you have on hand. I provide instructions for how to bake in a 9×5″ bread pan or on a cookie sheet in the recipe notes below.
Note that I do recommend having two 9×5 loaf pans so you can use one as a lid. Tented foil can also work if you don’t have two pans.
Yes! Make sure to let it cool completely, then wrap it really well and place in a freezer safe bag or container. I recommend enjoying your artisan bread within 3-6 months for best flavor. You can also slice the bread before freezing it to easily defrost one slice at a time (if I do this I usually individually wrap each slice to help ward off freezer burn).
To thaw, let the bread sit on the counter for a few hours to thaw, or toast individual slices in the toaster. You can also warm up in a 350F preheated oven for a few (about ten) minutes.
Unlike many store-bought breads, homemade artisan bread doesn’t include any processed ingredients or preservatives. So yes, you could say it is a healthier option!
What other bread recipes would you like to see this year? Let me know in the comments below!
Enjoy!
Let’s bake together! Subscribe to my newsletter to be notified of all the newest recipes, and find my free recipe tutorials on YouTube 💜
Artisan Bread
Ingredients
- 3 ½ cups (437 g) bread flour plus more if needed
- 2 ¼ teaspoons (7 g) instant yeast
- 1 Tablespoon (12 g) granulated sugar optional
- 1 ½ teaspoons (10 g) salt
- 1 ½ cups (360 ml) warm water 115F/46C
Recommended Equipment
Instructions
- In a large mixing bowl, whisk together flour, yeast, sugar, and salt.3 ½ cups (437 g) bread flour, 2 ¼ teaspoons (7 g) instant yeast, 1 Tablespoon (12 g) granulated sugar, 1 ½ teaspoons (10 g) salt
- Add warm water and stir until combined. Dough will be sticky.1 ½ cups (360 ml) warm water
- Cover bowl with plastic wrap and place in a warm place to rise until doubled in volume, usually 2-3 hours. Alternatively, cover dough and refrigerate overnight (no need for it to rise first, pop it right in the fridge).
- When dough has risen, scrape out onto a generously floured surface and form into a ball with your hands. If the dough is too sticky to handle, sprinkle a light amount of flour over the surface, adding more as needed to handle/shape the dough.
- Stretch and fold: Grasp the dough at the top (think 12 o’clock, if the dough were a clock face) and stretch it over the bottom (6 o’clock). Turn the dough 90 degrees and repeat. Repeat this step two more times for a total of 4 stretch and folds. I demonstrate this in the photos above and in the video, if a visual helps!
- Use your hands to form the dough into a ball again (don't be afraid to shape it, you want it to be more round than flat!), place on a large piece of parchment paper (the parchment should be large enough that you can lift it up and lower it into a Dutch oven), and lightly cover with plastic wrap.
- Allow dough to rest, covered, for 30 minutes. As it rests, preheat oven to 450F (230C) and place a 4qt Dutch oven (with lid) in the center rack of your oven.
- After 30 minutes, carefully remove Dutch oven from the oven. Score your bread down the middle, remove the lid off of the Dutch oven, and gently lower the parchment paper and bread into the pot. Place lid on top, and return to 450F (230C) oven.
- Bake for 30 minutes with the lid on, then remove lid and allow to bake for another 10 minutes. I like to check the internal temperature of my bread with an instant read thermometer to be sure it's finished baking, look for an internal temperature of 195-200F (90-93C) in the thickest part of the bread.
- Remove from oven and allow to cool in Dutch oven for 10 minutes, then use the parchment paper to carefully lift the loaf from the pot and transfer to a cooling rack to cool completely before slicing. Do let the bread cool until no longer warm to the touch or the interior will be gummy.
Notes
Video Note
I accidentally say to return the pot to the (350F) oven once the bread is added. I misspoke! You want the oven to remain at 450F the entire time.Baking in different dishes:
A 4 qt Dutch oven works best for this recipe, but you do have some other options that will work, too: 9×5” bread pan: After the “stretch and fold” process, gently roll dough into a loaf shape, tucking the ends under. Place in a greased bread pan and let sit, covered, for 30 minutes while oven preheats. After 30 minutes, score bread, cover pan with an inverted loaf pan (or tent with foil) and bake in 450F (230C) oven for 20 minutes, then remove the “lid” and bake another 10 minutes. Bake on a cookie sheet: After dough has risen, (step 3) scrape onto a generously floured surface and divide into two pieces. Form each into a ball, and follow the “stretch & fold” instructions in the recipe for each. Place on parchment paper lined cookie sheet, cover lightly with plastic wrap, and sit for 30 minutes while oven preheats (space the dough as it will increase in size). After rising, score each loaf and bake in 450F (230C) oven for 17-20 minutes. Larger Dutch oven: Baking time will likely be reduced and bread will be flatter.Flour
An equal amount of all-purpose flour could be substituted in a pinch.Storing
Wrap tightly or store in an airtight container for up to 5 days. Bread may also be tightly wrapped (or sliced and individual slices wrapped) and frozen for several months. To thaw, let sit at room temperature for several hours or toast individual slices. Whole loaves may also be rewarmed in 350F/175C oven for several minutes.Nutrition
Nutritional information is based on third-party calculations and should be considered an estimate only. Actual nutritional content will vary based upon brands used, measuring methods, cooking method, portion sizes, and more.


Amy
I made this last night to bake this morning. I’m new in the bread making world, so 2 questions. First, my loaf didn’t really rise much in the fridge overnight like I was expecting. I ended up pulling it out this morning and setting on the counter for 2 hours until I felt like it was the right size. Is that normal or okay? Second, I checked it after 20 minutes, and the top was already VERY brown (it was covered). There was no way it could go for 10 more minutes covered and then uncovered for 10. I ended up throwing some foil over the top under the lid in hopes of slowing down the process. Should I decrease my oven temp? It looks beautiful… just made me nervous when it didn’t turn out like I was expecting along the way. Thanks for sharing!
Sam
Hi Amy! It’s not going to rise very much in the refrigerator. For the top browning, do you have an oven thermometer? It sounds like your oven could be running a bit hot. I hope you still enjoyed it! 🙂
Lydia
I made this tonight and it was AMAZING! My husband said it is hands down, the best bread he’s ever had! So, huge thank you for sharing this recipe!
Question though, I want to make some for my co-workers, but one is gluten free. any suggestions when using gluten free flour?
Sam
I’m so glad everyone enjoyed it so much, Lydia! Unfortunately, I’m not sure how to make this gluten free. 🙁
Barbara
Can you use self rising flour instead of bread flour
Emily @ Sugar Spun Run
We don’t recommend it 🙁
Stephanie Wise
If refrigerating the dough overnight, should I let it come to room temp before stretch and folds?
Sam
Hi Stephanie! You can just scrape it out of the bowl onto a counter and start the process. 🙂
Terri White
This bread is in my oven as I type and the aroma is heavenly! This is the easiest bread I’ve ever made. We plan to take this to a sick friend tomorrow. Then we’re going to the grocery to get more bread flour. Thank you for the video and the verbiage. I thought the video said to preheat to 450 but then bake at 350 so the printed instructions were very helpful. Once again, a home run, touch down and a hole in one all in one recipe!
Emily @ Sugar Spun Run
Thanks for the review, Terri! We’re so happy our recipe was such a success for you 🥰
Talia
hi! i’m doubling the recipe but i don’t have a dutch oven would a cast iron work? i’m only baking one loaf at a time.
Sam
Hi Talia! Is it a cast iron bowl similar to a dutch oven? If so the cast iron will work. You need the height of the pot and the ability to cover it for the first part of baking. 🙂
Katie Ford
I’ve been looking for a bread with a crunchier crust and this was it !!! This has been a HIT in our house and my parents!!
Sam
I’m so glad you enjoyed it so much, Katie! 🙂
Katie Ford
Can you use active yeast if you don’t have instant?
Sam
Hi Katie! It should work, but it will take a bit longer to be activated.
Lori Kay Von Kemp
Why is my dough not sticky…I measured exactly (not on a scale). Will it still work?
Sam
Hi Lori! Without being there I can’t say for sure how it will turn out. I hope you still enjoyed it! There may have been just a touch too much flour which can very easily happen if you don’t weigh your flour. 🙁
Steph
hi, can I bake on cookie sheet without separating in two?
Sam
Hi Steph! I’m not sure how it would go on a cookie sheet. It would likely spread out and be really thin.
Jacqueline
This is only my second time making bread, so I really appreciated the easy recipe! It did not take too much effort but ended up tasting really good! I think it also helped that my house is warm which helped the dough rise. I do not have a Dutch oven, so I used a circular pan and covered it with a large pot, and it worked! The only thing that hat could be better is that the outside of my bread was a too crunchy, probably because I left it in the oven too long after removing the pot that was covering it. Thank you for the recipe!
Emily @ Sugar Spun Run
Thanks so much for the review, Jacqueline! We’re happy your bread tasted so good 😊
christy
Have you tried this recipe with different mixes of flours? e.g., bread flour and whole wheat / grain?
Sam
Hi Christy! Unfortunately I have not experimented with it so I can’t say for sure how it would work.
Kellie
My Dad was a baker, and I grew up baking with my Gramma, (I won’t say how many years ago that was) so believe me when I say, this
bread is freakin’ FANTASTIC! Easy, peasy, and delicious. love the flavor, the soft inside and the crunchy crust. it’s perfect and I will be adding this recipe to my recipe.box!
Sam
I’m so glad you enjoyed it so much, Kellie! I’m so happy to hear it was up to par with Dad’s and Gramma’s! ☺️
Karen Reiersen
Thought I followed all your steps but my bread seems tough and hard to cut any tips.thanks
Sam
Hi Karen! The outside is usually quite crusty (this is a good thing!) So you may not have done anything wrong at all. Did you use a serrated bread knife? How was it on the inside?
Becky D
Hello Sam, first time to ask a question. Been looking for Dutch oven in the stores and only found and bought a 3.5 . Will this work and the timing to bake a little longer?
Made many recipes of yours with correct measurements you list. All have been super good and easy.
Thank you and hope to hear soon
Sam
Hi Becky! The 3.5 qt should work you may just need a little longer on the bake time. I’m so glad you’ve enjoyed everything so much! 🙂
Shelley
I’ve got a 3 1/2 quart oval. Do you think it will “overflow” if I use that? It looks so good !
Sam
Hi Shelley! I haven’t tried it. There’s a chance it could rise above the top of your dish but I’m not sure.
Courtney
wow this recipe is so easy! I thought I was gonna mess something up as I am a rookie to making bread but it turned out beautiful and so delicious! thanks for the recipe
Sam
I’m so glad you enjoyed it so much, Courtney! 🙂
Seth
Hello Sam! I just made my first loaf of your bread in my Staub Dutch Oven and when I pulled it out of the oven The internal temperature read about 165 to 170. Is that OK? I noticed you said 190 to 200. I can’t wait to bite into it, because it looks spectacular, but you are right that I must have patience and let it cool.
Sam
Hi Seth! That is a little low on the temperature. If it is a little gummy or dense in the center it may have needed a little more time. I hope you love it! 🙂